Vintage fades and washes have recently become quite popular. Perhaps since modern DSLRs, mirrorless cameras, and even smartphones can capture such high-quality, color-neutral images, there’s more of a desire to reach toward the past with these vintage effects. Or perhaps vintage effects offer viewers a sense of nostalgia, which is very much in vogue.
Regardless of the reason you want to add a vintage effect to your images, I’m happy to report that it’s a relatively easy look to achieve. In Photoshop, I like to create vintage washes by cross-processing with Curves, and that’s what I’ll explain today. It’s also important to realize that you can get similar results using Curves in other post-processing programs (such as Lightroom); plus, there’s more than one way to get the look you’re after, so once you understand the basics, feel free to experiment with other post-processing tools!
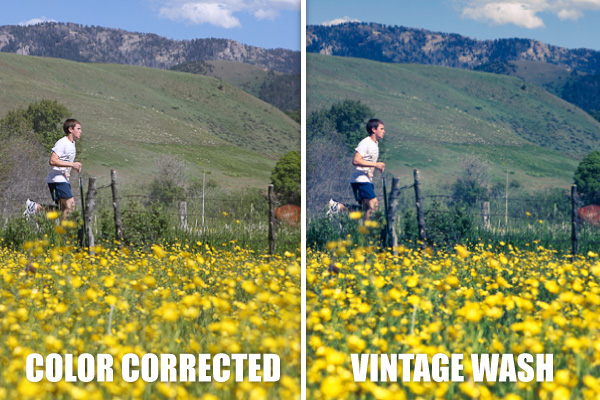
Oh, and the best part? This technique will take you less than one minute to do manually, and only seconds if you turn it into a Photoshop Action.
Let’s dive right in!
What is a vintage look?
Before we get into creating the effect, I want to briefly discuss what we are trying to achieve. In vintage photos, colors fade over time. The first color to typically begin fading is usually the blues in the highlights of the image. Because of this, the reds and greens of an image become more prevalent in the highlights.
However, the reds and greens fade in the shadows, thus revealing more of the blues in the darker portions of vintage photos.
In other words, for a vintage effect, you want to remove blues in the highlights, while removing the reds and greens in the shadows (and vice versa).
This process is exactly what we are going to mimic in Photoshop using Curves. What’s cool about Photoshop’s Curves tool is that it lets you target different color channels individually by tweaking the relevant graph; not only does this allow for a lot of precision, but it also helps you visualize the necessary adjustments.
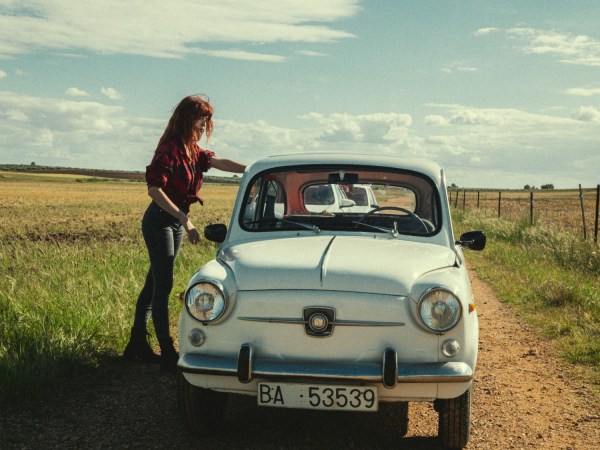
Below is our standard color-corrected image to which we will apply our effect:
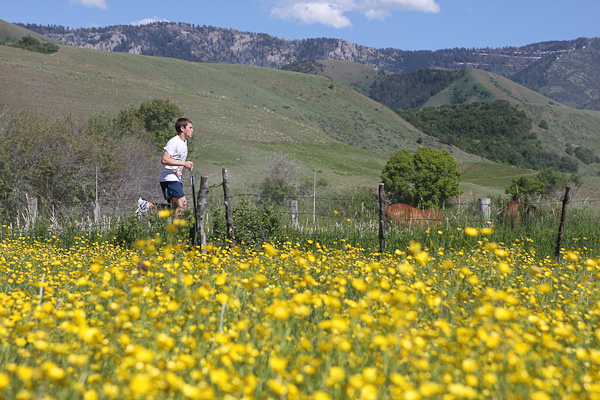
By the end of the tutorial, the image will look far less modern and give off those nostalgic, vintage vibes!
How to apply the vintage look in Photoshop
As I explained above, adding a vintage look is easy, and you can do it in under a minute. Here’s my step-by-step approach (and I encourage you to follow along with an image of your own):
Step 1: Open your image and create a Curves adjustment layer
To start, you’ll want to pick an image that will look nice when given the vintage treatment. This is somewhat subjective, but it might make sense to work with a photo that contains relatively timeless subjects. In other words, it’s perhaps a good idea to vintage-edit a photo of a classic car rather than a photo of last year’s Chevy SUV. (On the other hand, it can be interesting to contrast a vintage look with a modern subject…so don’t take my thoughts here too seriously!)
Make sure that your image is already color-corrected (you can do this in Adobe Camera Raw or Adobe Lightroom Classic) so it’s ready for the vintage treatment.
And finally, with the image open in Photoshop, add a Curves adjustment layer:
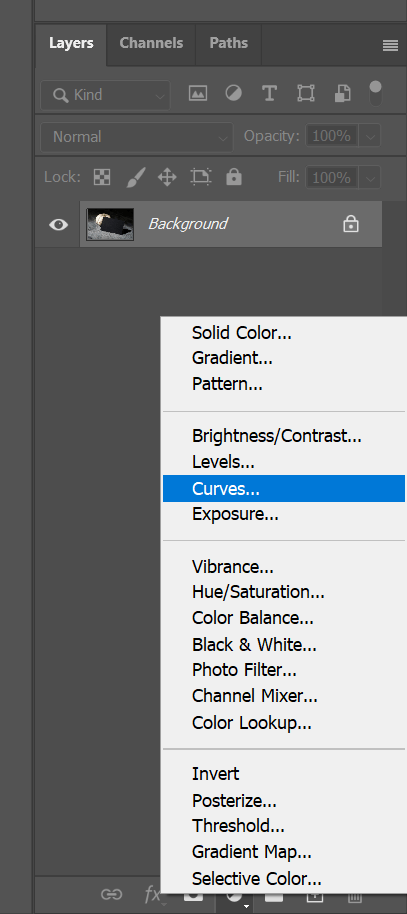
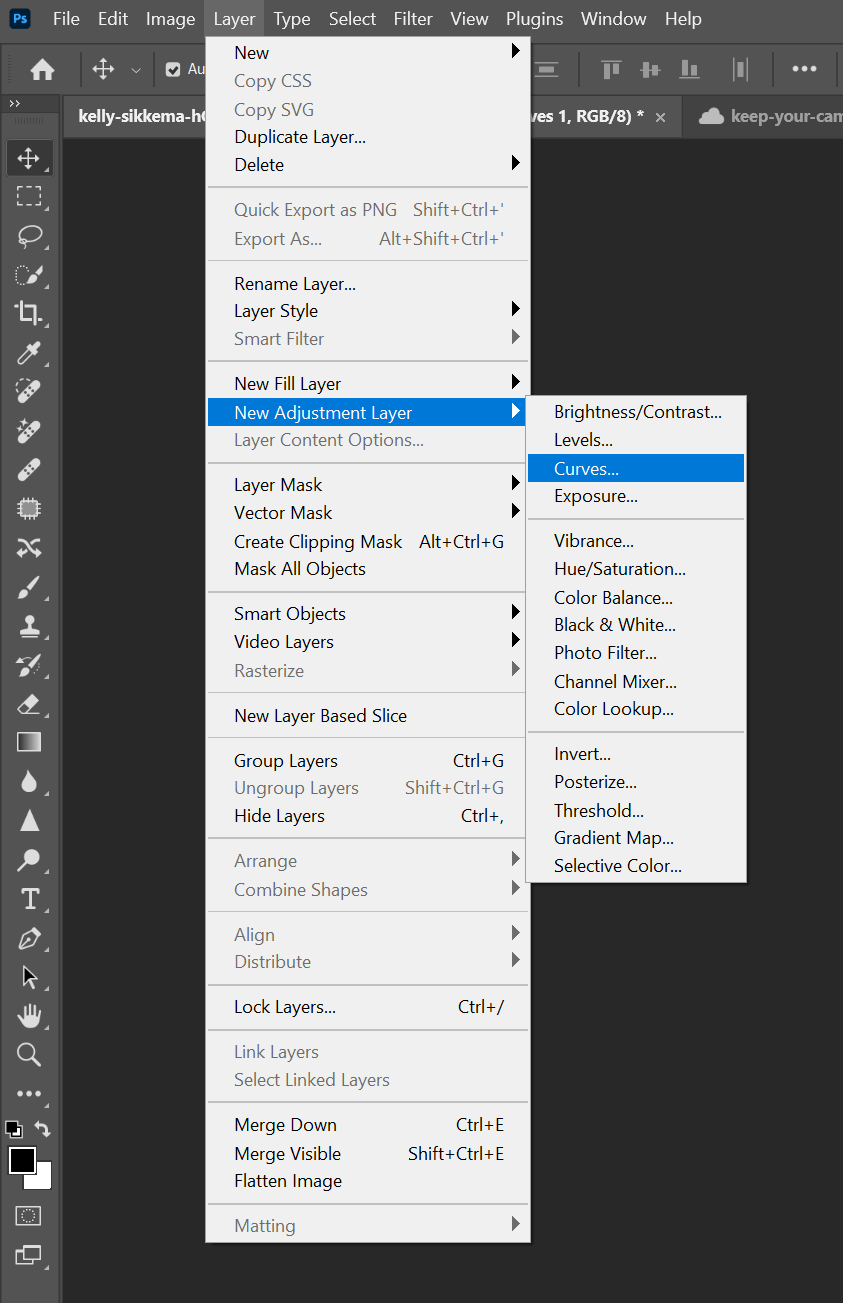
You can click on the Adjustment Layer icon, as shown above; alternatively, you can select Layer>New Adjustment Layer>Curves in the main Photoshop menu.
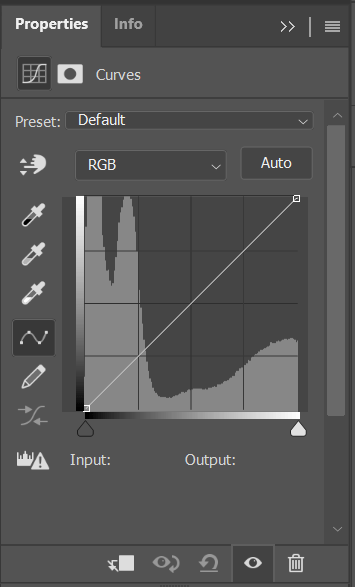
You’ll then see a box like this one:
Step 2: Adjust the Red channel
As we mentioned, vintage photos fade so the reds are pumped up in the highlights and dropped in the shadows to reveal the blues.
We are going to do just that by selecting the Red Channel in our Curves dialog box:
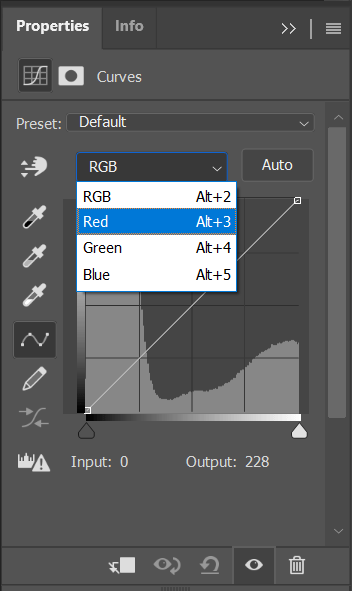
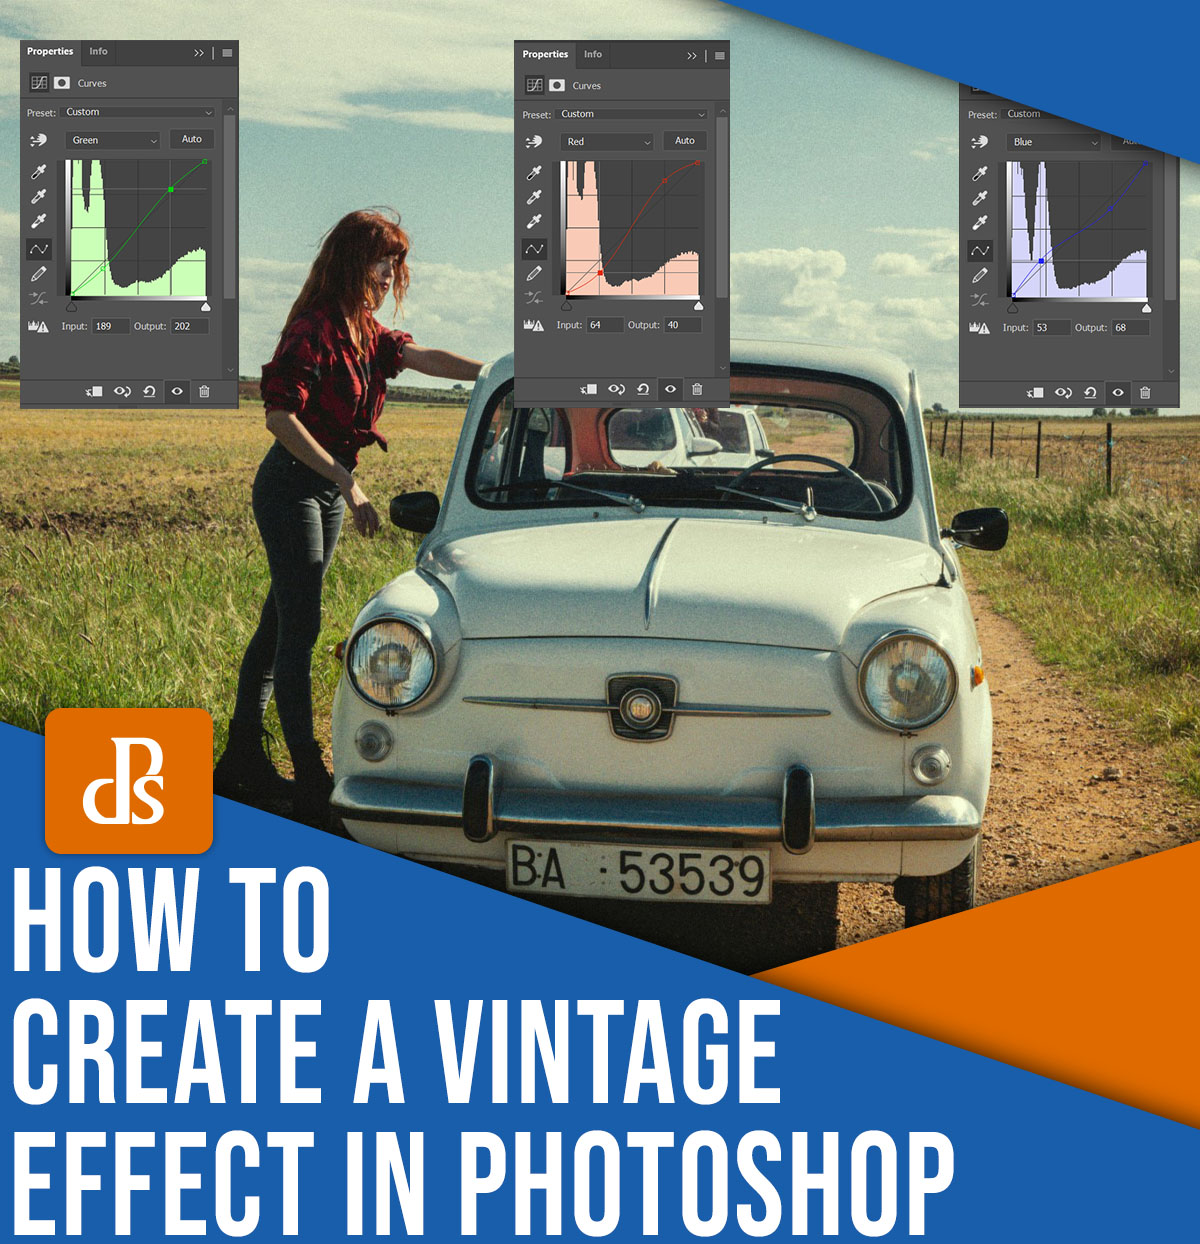
Next, add a point on the line near the highlights (around three-fourths of the way into the graph) and drag the curve upward. Then add a point near the shadows (around one-fourth of the way into the graph) and drag downward. You should see an S shape like this:
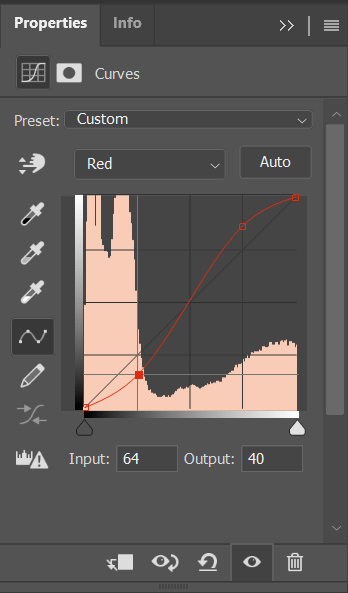
Just bear in mind that the amount you drag the curve will depend on the intensity of the effect you want. The more you push and pull the curve, the more intense the vintage look will ultimately appear. Fortunately, since we’re using adjustment layers, we can always go back and make further tweaks later on!
Step 3: Adjust the Green channel
Now we are going to do the exact same thing with the Green channel.
Select the Green Channel and create the exact same effect by pulling up in the highlights and down in the shadows:
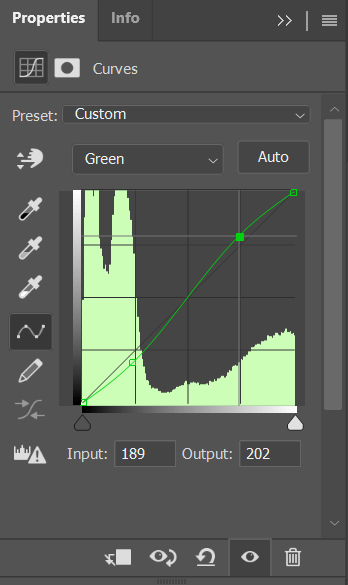
Just a quick tip: I usually like to inflate the reds slightly more than the greens, as you’ll see if you compare the graph displayed in the previous step to the graph displayed in this step. That way, the image gets slightly warmer highlights and slightly cooler shadows.
Once this step is complete, it’s time to work on the final channel:
Step 4: Adjust the Blue Channel
Earlier in this article, I talked about how vintage images typically lose blues in the highlights while the blues become more revealed in the shadows because of the loss of greens/reds. We’ve already pushed our image in that direction by tweaking the Red and Green channels; now let’s do it with the Blue channel.
This time, instead of creating a conventional S-curve, we’re going to produce an inverted S by pulling down the highlights and pulling up the shadows, like so:
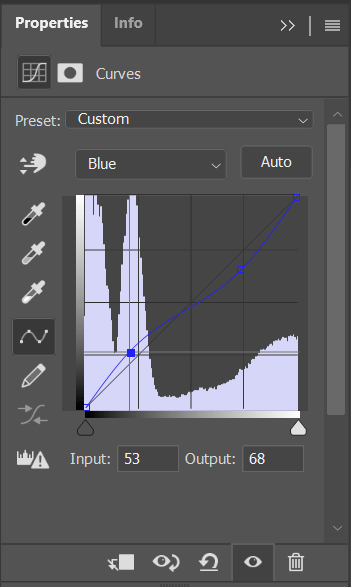
And that’s basically it! By pulling up the shadows, we’ve increased the intensity of the blues in the darker parts of the image – and by pulling down the highlights, we’ve effectively made them warmer (i.e., more yellow).
Add finishing touches, then share your vintage-style photo!
Look over your edited image and see what you think. It can also be helpful to compare the edited version to the original by turning on and off the Curves layer in the Layers panel (just click the Eye icon next to the relevant layer).
If you feel like the effect is too strong or doesn’t look quite right, you have a few options. You can simply drop the opacity on your Curves adjustment layer, which will reduce the vintage look across the board. Or you can double-click on your Curves layer to open the Curves dialog box, then tweak the channel graphs until you get a better result.
Once you’re done, you should see something like this:
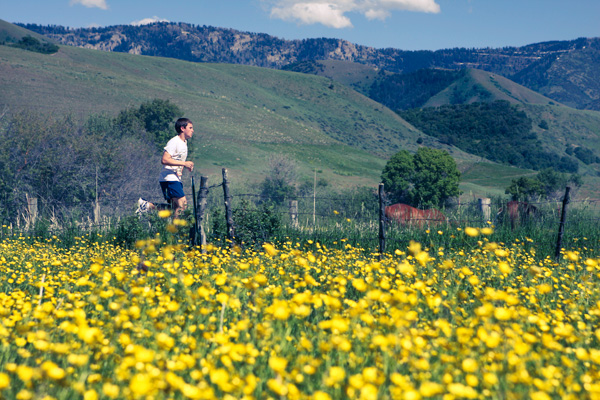
Which you should then share on social media, or at least in the comments below!
