Let’s say that you’ve been taking photos for a while now. You’ve got yourself a good DSLR or mirrorless camera, and you’ve recognized that the standard 18-55mm kit lens that comes with your camera, while nice, doesn’t give you the shots you’re looking for.
So you plunk down your money on a wide-aperture prime lens, such as the 50mm f/1.8 that everybody is talking about, mount it on your camera, change your aperture to its widest setting, and start shooting. You spend all day photographing with this wonderful little lens. Then you get home, review your files on your computer, and realize that 80% of your shots are out of focus.
This used to happen to me. And when it did, I concluded that shooting wide open was just not possible because I ended up with too many shots that were out of focus. I incorrectly reasoned that I always needed to close down my aperture when shooting portrait subjects, or they would end up out of focus because the maximum aperture – and its consequently shallow depth of field – was just too unusable wide open.
For a while, I only used my 50mm f/1.8 lens at f/4 because it was the widest aperture that I trusted to get the shot in focus. It’s crazy, I know, and it was severely limiting, too. (Try shooting low-light portraits at f/4!) But then I figured out something that has changed my use of wide-aperture lenses forever:
The depth of field is not solely determined by your aperture setting and the lens focal length. It’s also determined by your distance from your subject.
In other words, it’s possible to capture shots with a deeper depth of field while using a wide aperture – and it’s possible to capture shots with a shallow depth of field while using a narrow aperture.
Let me explain…
Understanding the basics of aperture and depth of field

Before we continue, I want to break down the meaning of “aperture,” “wide open,” and “fast primes.”
First of all, aperture refers to the size of the diaphragm inside your lens. When you dial in a wide aperture (e.g., f/1.8) the lens diaphragm opens up, and – all else being equal – you end up with a small plane of focus (i.e., a shallow depth of field effect). When you dial in a narrow aperture (e.g., f/8), the lens diaphragm closes down, and you get a greater plane of focus (i.e., a deep depth of field effect).

Second, to shoot wide open means that you are choosing to photograph at your lens’s widest aperture setting or f-stop. The maximum aperture setting varies from lens to lens. If you’re unsure of your own lens’s widest aperture, you can check the manufacturer’s website, though on a lot of lenses, this value is listed somewhere on the lens itself. (Canon usually lists it on the front of the lens, and Nikon lists it on the lens body. Generally, it’s written as a ratio that looks something like this: 1:2.8, 1:1.8, and so on.
Finally, a fast prime lens has one focal length (i.e., it does not zoom) and has a relatively wide maximum aperture. The wide aperture can let in a lot of light, which makes it easy to use faster shutter speeds in dim conditions, hence the name. Most photographers consider a fast lens to have an aperture number of f/2.8 or wider (the smaller the number, the wider the aperture).
Two of the most popular features of fast prime lenses are their ability to create beautiful out-of-focus backgrounds, as well as their ability to handle low-light conditions because of the aforementioned large apertures.
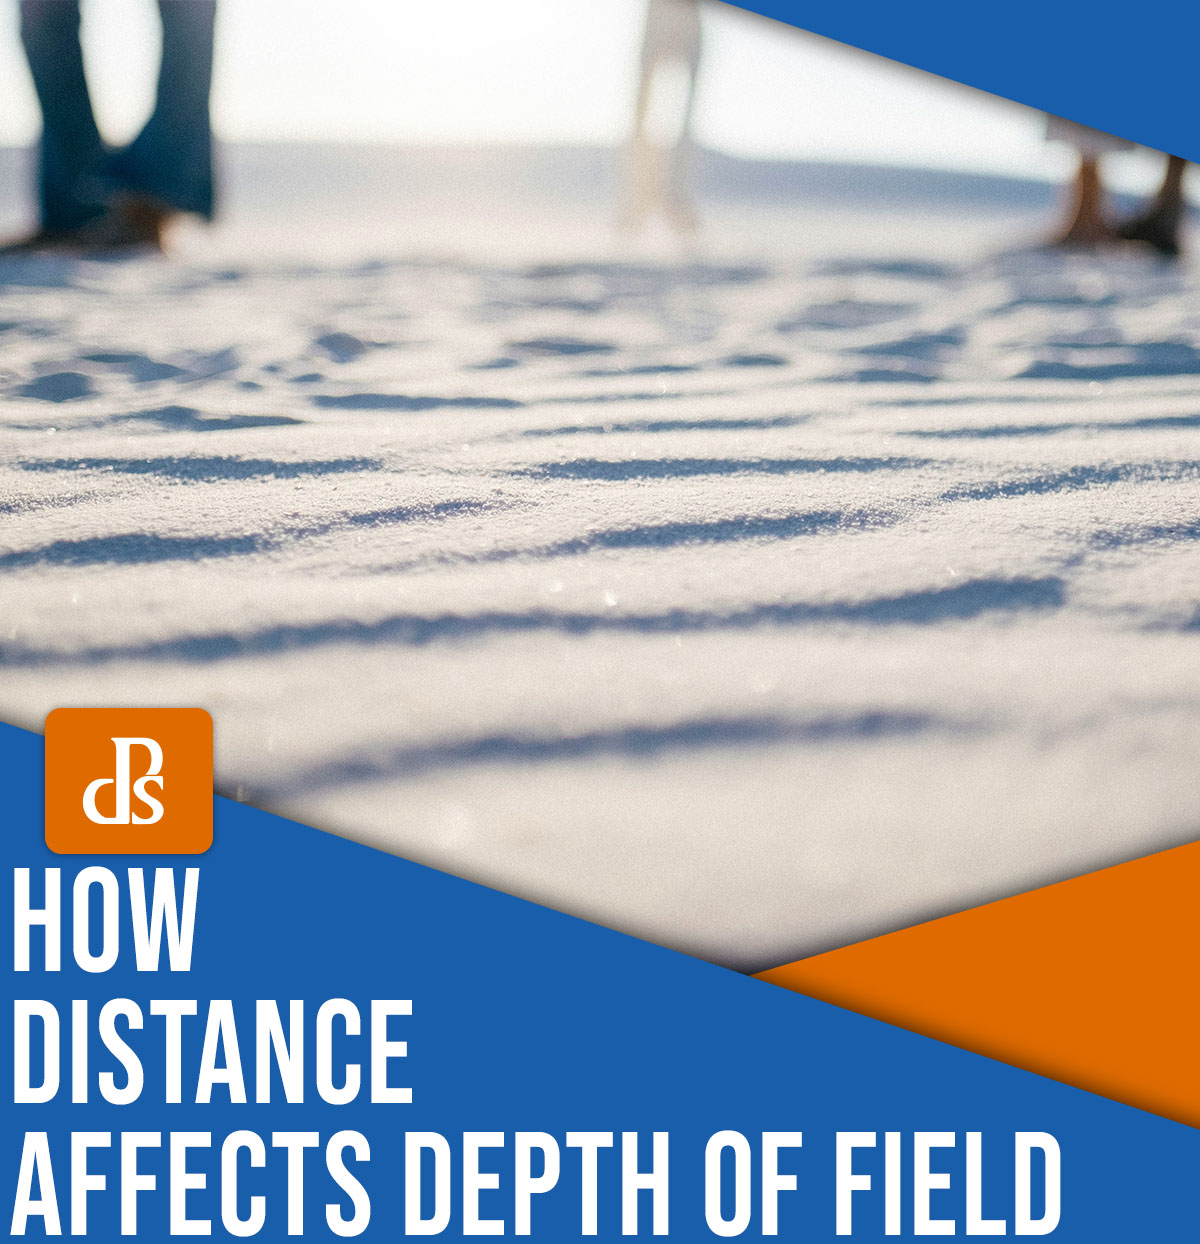
Distance affects the depth of field

Let me let you in on a little secret about achieving a shallower depth of field: it’s about the aperture setting, and it’s about the focal length, but it’s also about the distance to your subject.
Most people learn that wide-aperture settings blur the background and let in more light, but they never understand that how close they’re standing to their subject matters, too.
You won’t find many manuals on subject-to-camera distance. It’s a topic that doesn’t get enough attention, and while it sounds tricky, it’s really not. Let’s look at it as simply as possible: the closer you are to your subject, the shallower the depth of field relative to your chosen aperture.
So if you are shooting a 50mm lens at f/1.8 and you are 20 feet away from your subject, you will have more depth of field than you will if you are shooting with the same lens and same aperture setting 2 feet away from your subject.
To get more mathematical, if you’re using a 50mm lens at f/1.8 and photographing something at 4 feet, your depth of field will be around 1.5 inches deep. But if you take a few steps back so that you’re photographing that same subject from 10 feet, you will have a depth of field of close to 10 inches.
What I’m hoping to convey is not that your aperture setting doesn’t matter. Rather, I want you to understand that even with an ultra-wide aperture, such as f/1.8, you can take photos without feeling like most of the shots will turn out blurry. The key is to ensure there’s enough distance between you and your subject!
Comparison photos
To illustrate the point, let’s take a look at a few sample photos. For these images, I’ve used the same 35mm lens at its widest aperture (f/1.4). However, I’ve changed the distance between my camera and my subject so you can see exactly how depth of field is affected.
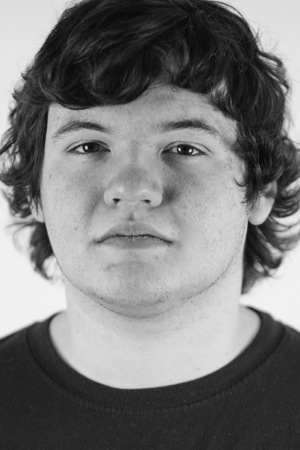
First, I’ve photographed this subject from a distance of 2 feet:
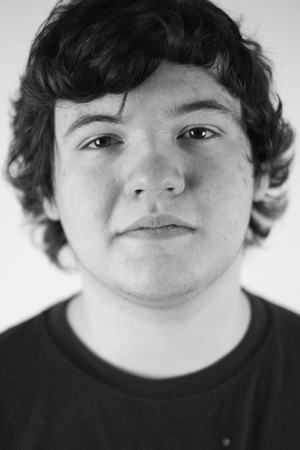
Notice the shallow depth of field effect? Since I was close to my subject and using an f/1.4 aperture, the hair and body are starting to blur, even if the nose is sharp.
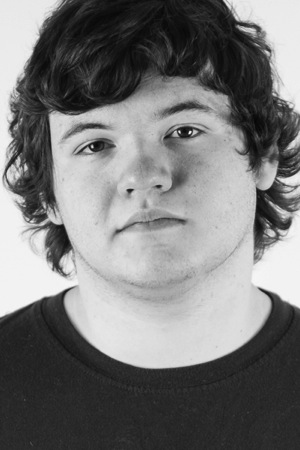
Here’s what happens, however, when I use that same f/1.4 aperture but move back a few steps (so that I’m approximately 9 feet from my subject):
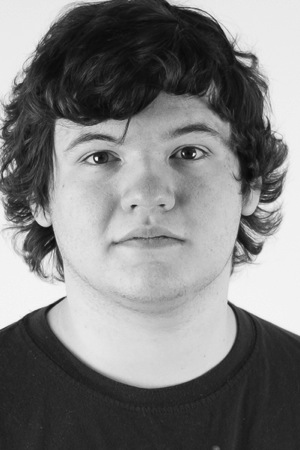
The subject’s face is completely in focus, and the subject’s t-shirt and hair are much sharper than before. Of course, when you move farther away, you’ll end up with more space around your subject – but for the purposes of comparison, I’ve cropped this second image so the framing is the same.
Here’s another example, this time featuring a smaller, more product-like subject. The first shot was captured at 35mm and f/1.4 with the camera at a distance of 2 feet:

As you can see, the back of the cup, and especially the most distant pencils, are starting to blur. I was too close!
Now look what happens when I move back to 9 feet:

Those back pencils are suddenly much sharper, and it’s all thanks to the greater distance! (Again, I’ve cropped the image so the framing is the same.)
Get to know your lenses!
Now that you’re familiar with the “hidden” factor affecting depth of field, it’s very important that you get to really know your lens and its abilities. For instance, if you happen to know that you shoot a lot of portraiture close to your subjects, be aware of how much depth of field your lens gives you at three feet, four feet, and so on, when shooting wide open. With experience, you will be able to immediately predict the depth of field your lens will give you based on the distance you are away from your subject!
This next photo was captured at 5 feet using my 85mm f/1.4 lens:
But when I moved back and cropped for similar framing, this is the result:
The depth of field does increase in the second image, though not as dramatically as in my previous examples due to the longer (85mm) focal length.
Change your distance, control the depth of field
If your photos are coming out blurry when you’re shooting wide open, you can work on your focusing technique or use a narrower aperture – but you should also think about your distance from the subject!
One caveat is that moving away from your subject will widen the frame, so you’ll need to make different compositional decisions to account for the increased space.
Regardless, the next time you find yourself frustrated at your results shooting with that fast lens at its widest aperture, take a step or two back. You might like the results!
Now over to you:
Do you struggle to capture sharp photos at wide apertures? Do you have additional tips for managing fast lenses? Leave your thoughts in the comments below!

Read more from our Tips & Tutorials category
is a part-time photographer,full-time teacher living in Harrisburg, Pennsylvania. He has been teaching high-school photography courses for over 7 years and has owned his own portrait and wedding photography business with his wife since 2009. You can see more of his portrait work on his website and on his tumblr blog here.