Do you know how and when to use Screen blend mode in Photoshop to improve your images? While you probably realize that you can change the blending modes of your layers, determining which mode to use each time can be tough.
To make the most of Screen blend mode, it’s important to understand how it works. In this article, I start by explaining what Screen is and what it does to your images; I then share when to use it for the best results, and I give you some practical examples, too. I close with a couple of extra tips to help you master the blend mode and use it to improve your Photoshop editing.
So if you’re ready to become a Screen master, then let’s dive right in!
What is Screen blend mode?
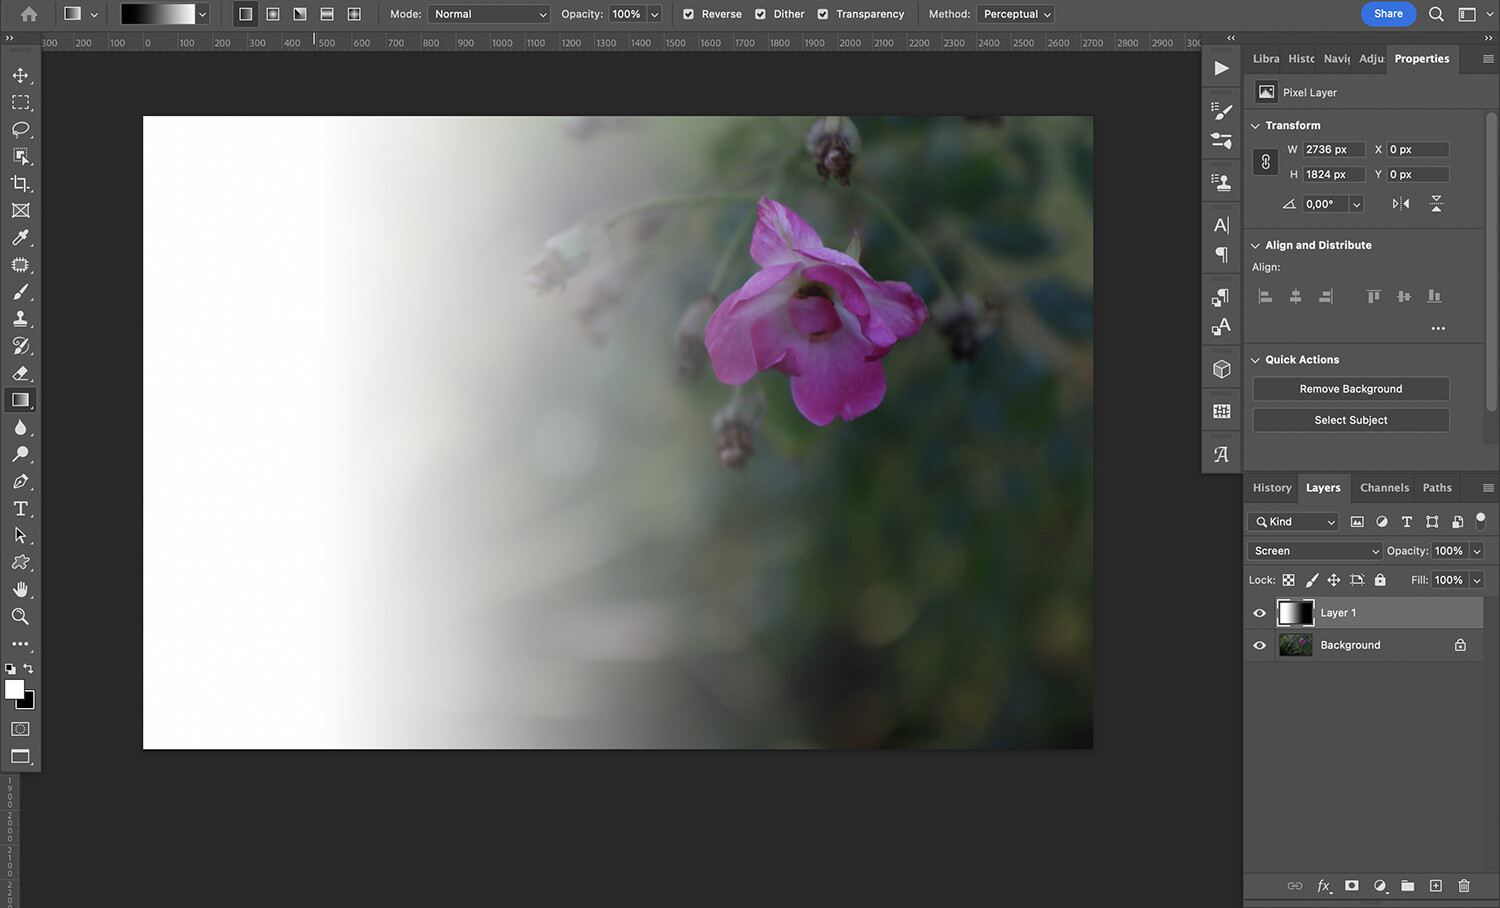
First things first: Photoshop allows you to work with layers of different types (including image layers and adjustment layers). You can make each of your layers interact with one another – and blend modes are the mechanisms that guide this interaction. In other words, by choosing different blend modes, you can ensure that your layers interact in different ways.
Now, Photoshop’s blend modes are divided into categories. Screen belongs to the Lighten category because it lightens images (more about that in a moment!). Technically speaking, Screen inverts, multiplies, and once again inverts the value of the pixels. Let’s see what this means in practice:
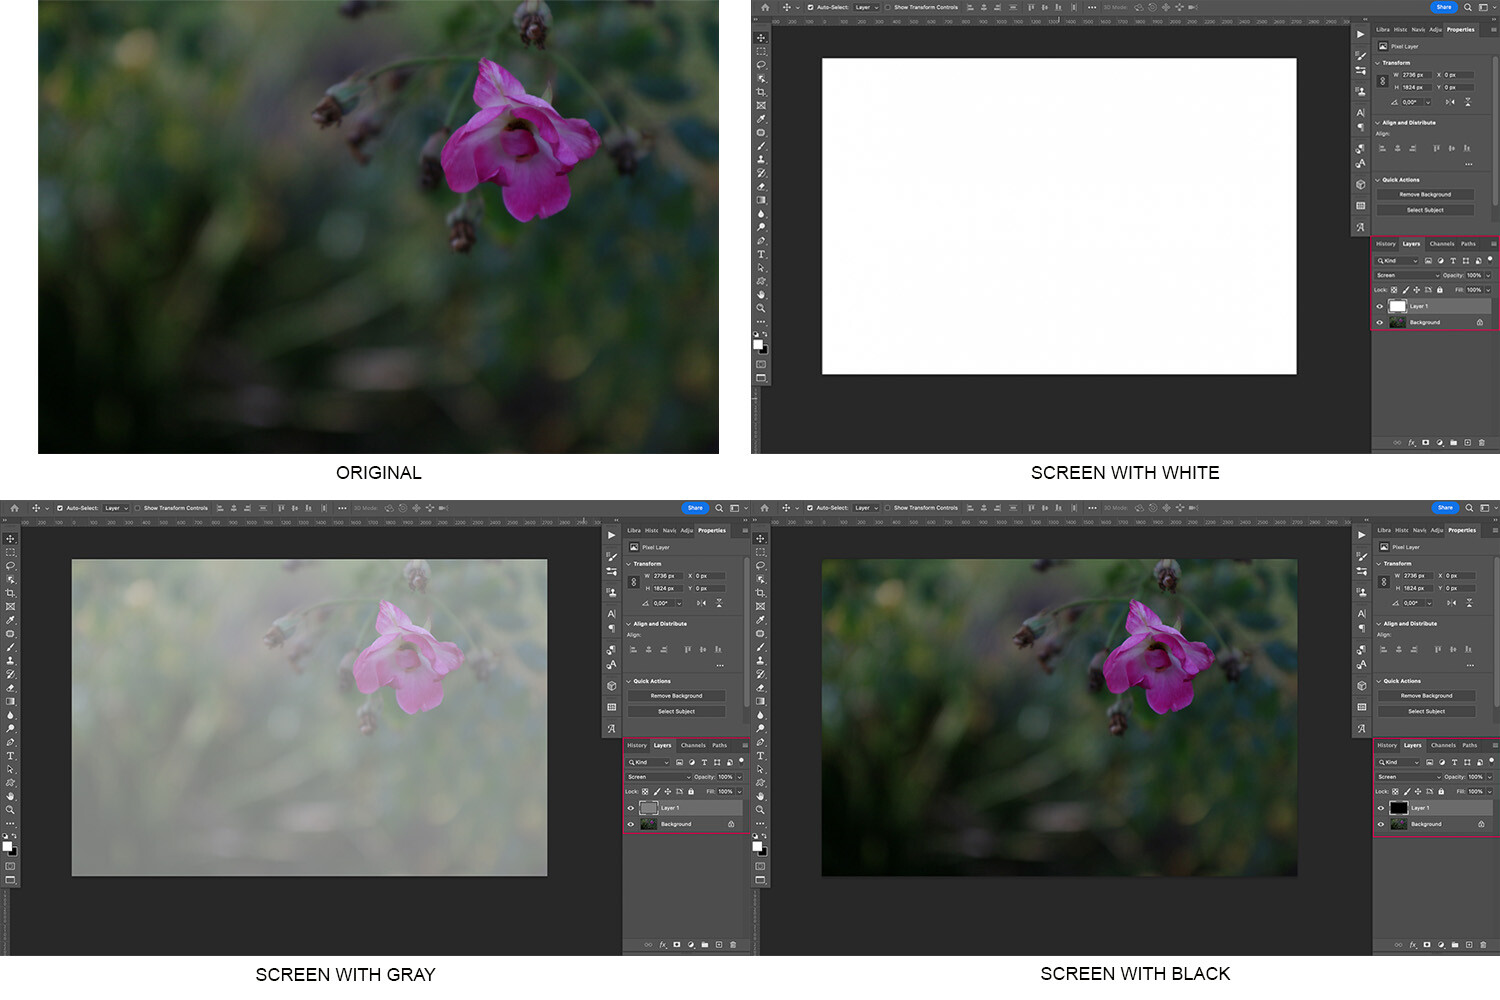
As the examples show – in which white, gray, and black layers are blended with my original flower file – Screen generally lightens the original image. However, if you use Screen to blend an image with a black layer, the colors won’t change – and if you use Screen to blend an image with a white layer, you’ll get a pure white result.
When should you use Screen blend mode?
Screen is useful in two main situations: When you want to adjust or correct your image, and when you want to do photo compositing. Let’s take a look at both scenarios in turn:
1. For photo editing
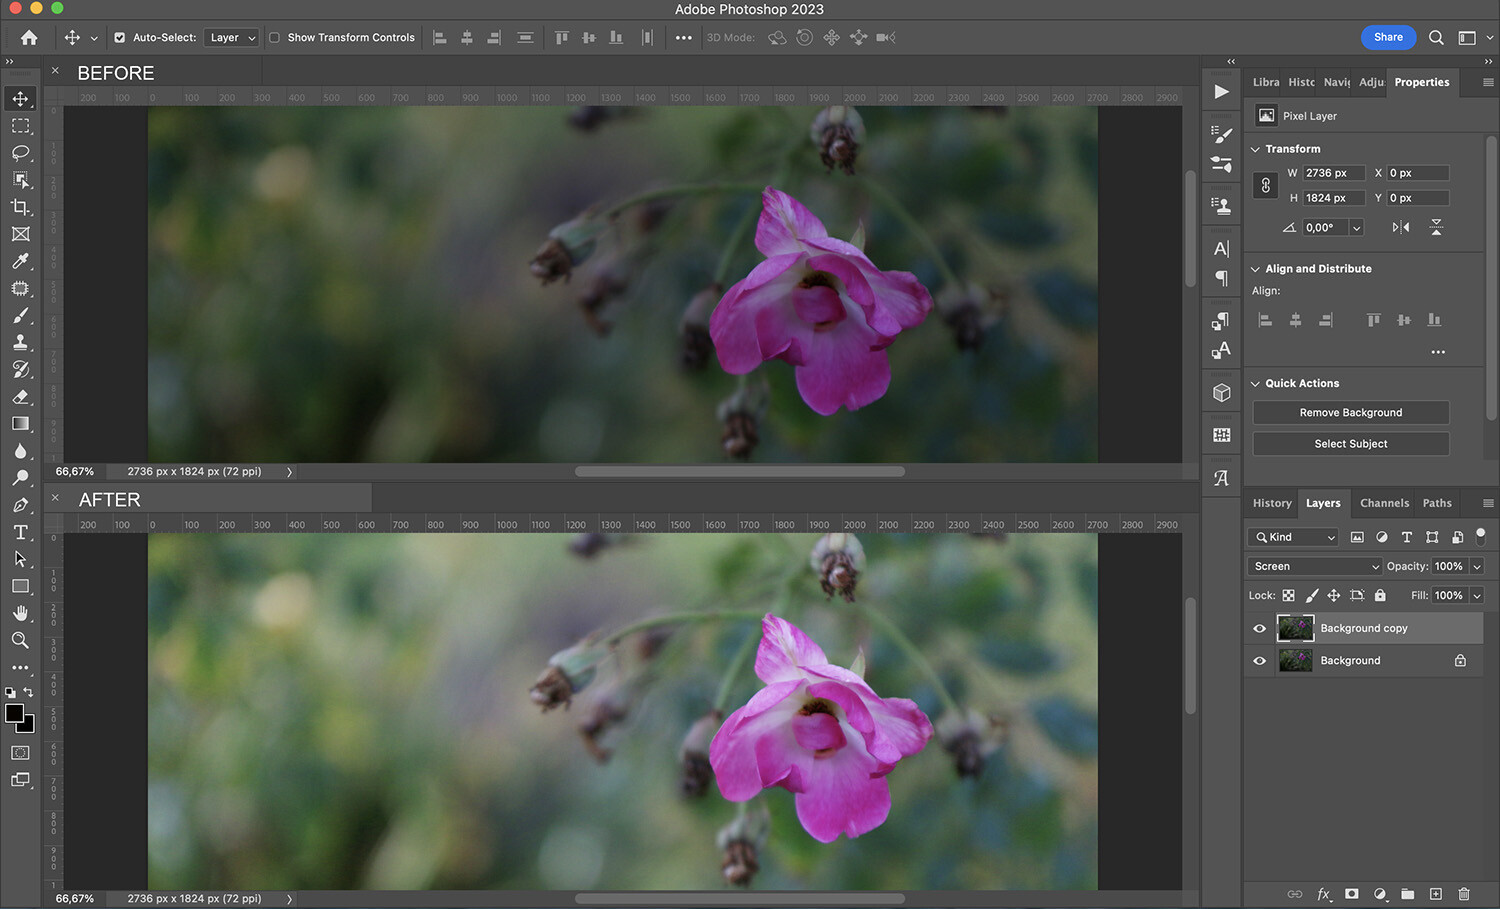
As I mentioned above, Screen blend mode lightens your image – which means it comes in handy when you have underexposed (i.e., too dark) photos.
Simply duplicate your image layer, then change the blend mode to Screen. Your photo will immediately lighten:
It’s also possible to use the Screen blend mode – in combination with the Multiply blend mode – to add contrast.
You see, Screen and Multiply are opposites, so when you have an image that’s dull or flat, you can duplicate the image twice. Then change the blend mode to Screen on one of the duplicates and the blend mode to Multiply on the other!
All you need to do is duplicate the image two times. Change the blend mode to Screen on one of the duplicates and Multiply on the other, and your image will gain a bit of contrast.
2. For photo compositing
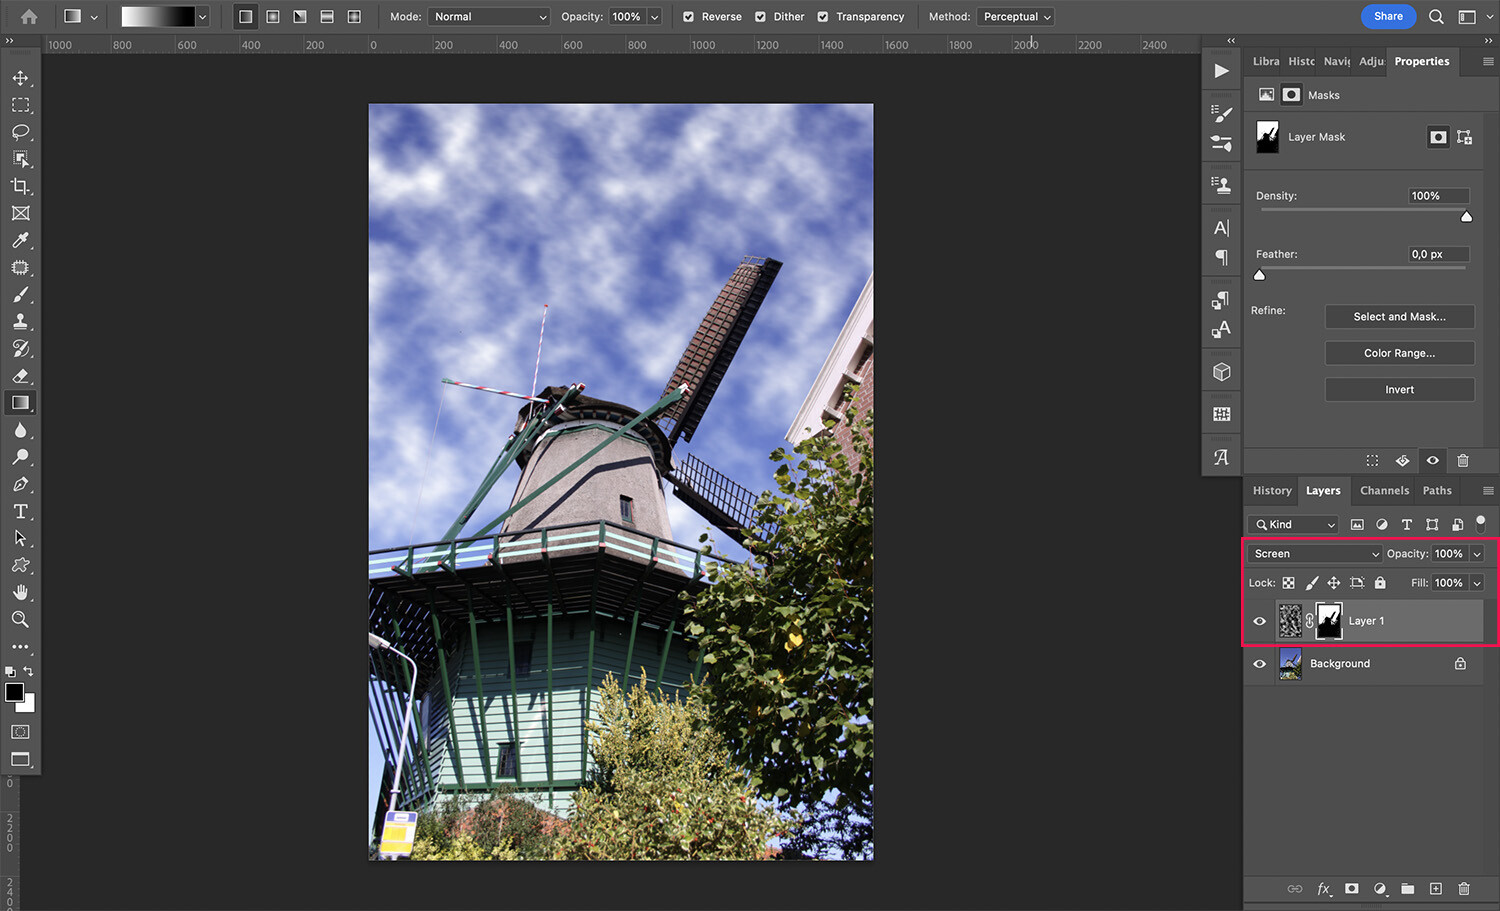
In the first section of this article, I showed you how black pixels won’t have any effect on your image when you use the Screen blend mode. And when you’re making a photo composite, this can certainly come in handy!
Why? Because when you paste a subject on a black surface, you won’t need to waste long minutes selecting and masking it. Instead, you can simply change the blend mode to Screen, and the black background will disappear. (Some common examples where this works well is when compositing smoke, lightning, and bokeh.)
How to use Screen blend mode: step by step
Working with Screen is extremely easy, and even Photoshop beginners should be able to grasp the basics.
Start by opening the image you want to edit in Photoshop. Then add a second layer (on which you’ll be using the Screen blend mode). It doesn’t matter if it’s a duplicate of the original file, a new image, or an adjustment layer; Screen is used the same way in each scenario.
For my example, I’m duplicating the Background layer. To do this, you can click on the layer and drag it to the Add New Layer icon at the bottom of the Layers panel, or you can use the Duplicate Layer command in the Layer menu:
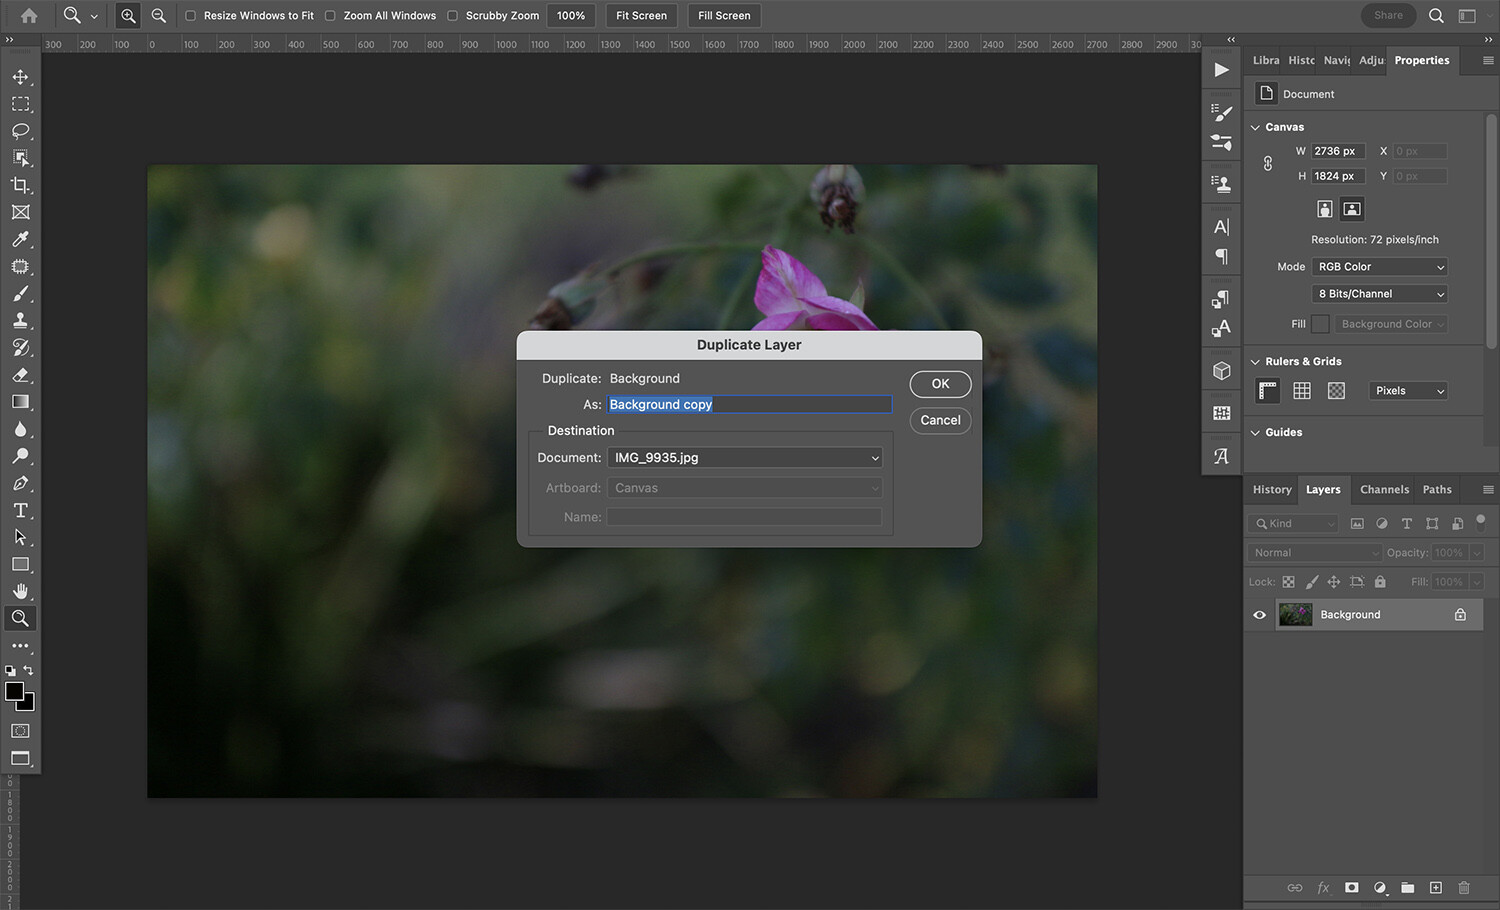
Make sure your new layer is selected, then open the blend mode menu (you’ll find it at the top of the Layers panel). Scroll until you find Screen:
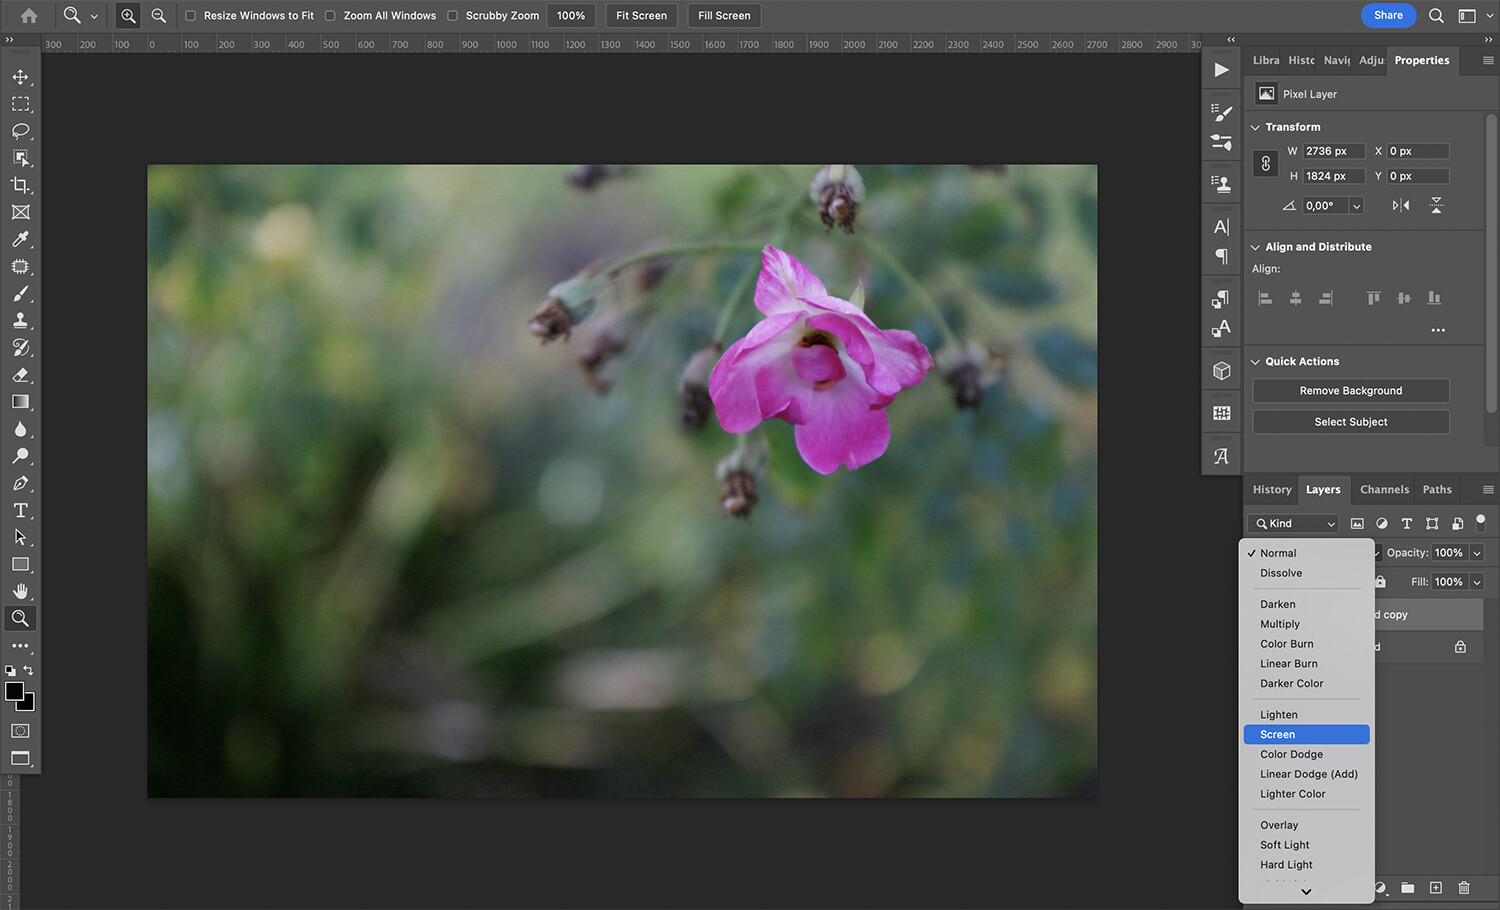
If you’re using Photoshop CC, you’ll see a preview of each blend mode’s effect as you hover over it in the menu. However, to apply Screen (or any other blend mode), you’ll need to click on it.
If the result is a little too intense, go ahead and adjust the opacity. You’ll find this option at the top of the Layers panel next to the blend mode menu:
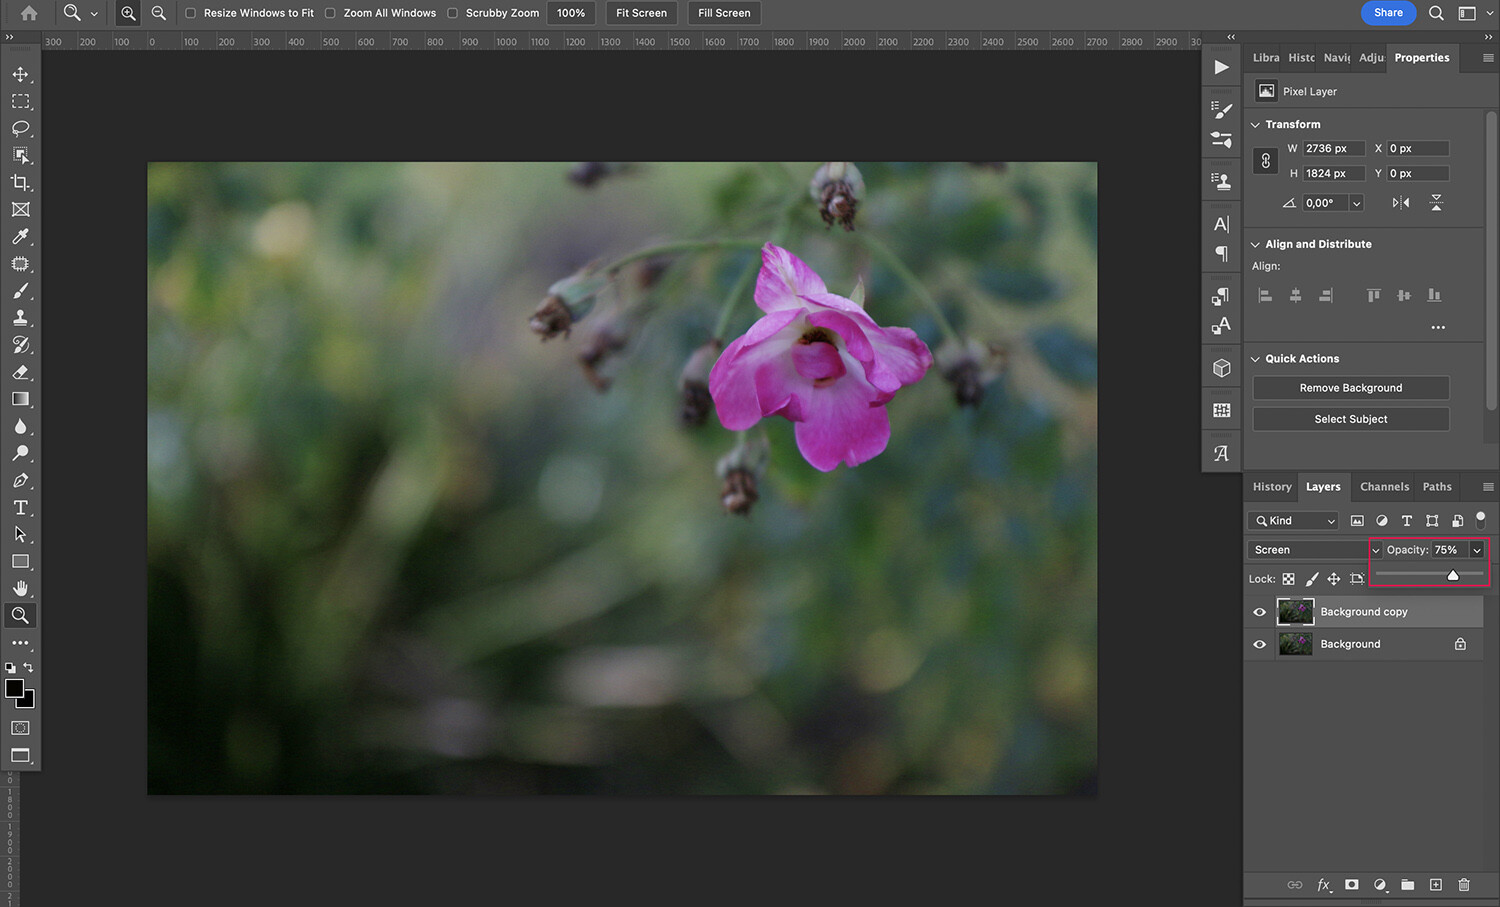
By default, the opacity will be at 100%. To adjust it, click on the arrow next to it to open the slider. Then simply move the slider until you’re happy with the result!
Screen blend mode: A step-by-step example
As I mentioned above, there are many uses for the Screen blend mode. In this example, I show you how it can be used to recover underexposed photographs, then I explain how to combine it with the Multiply blend mode to add contrast.
By the time I’m finished, you’ll see how much detail you can recover from a poorly exposed photograph without losing any information.
Step 1: Duplicate your image layer
You’ll need to start by opening your image; by default, it will appear as a locked Background layer:
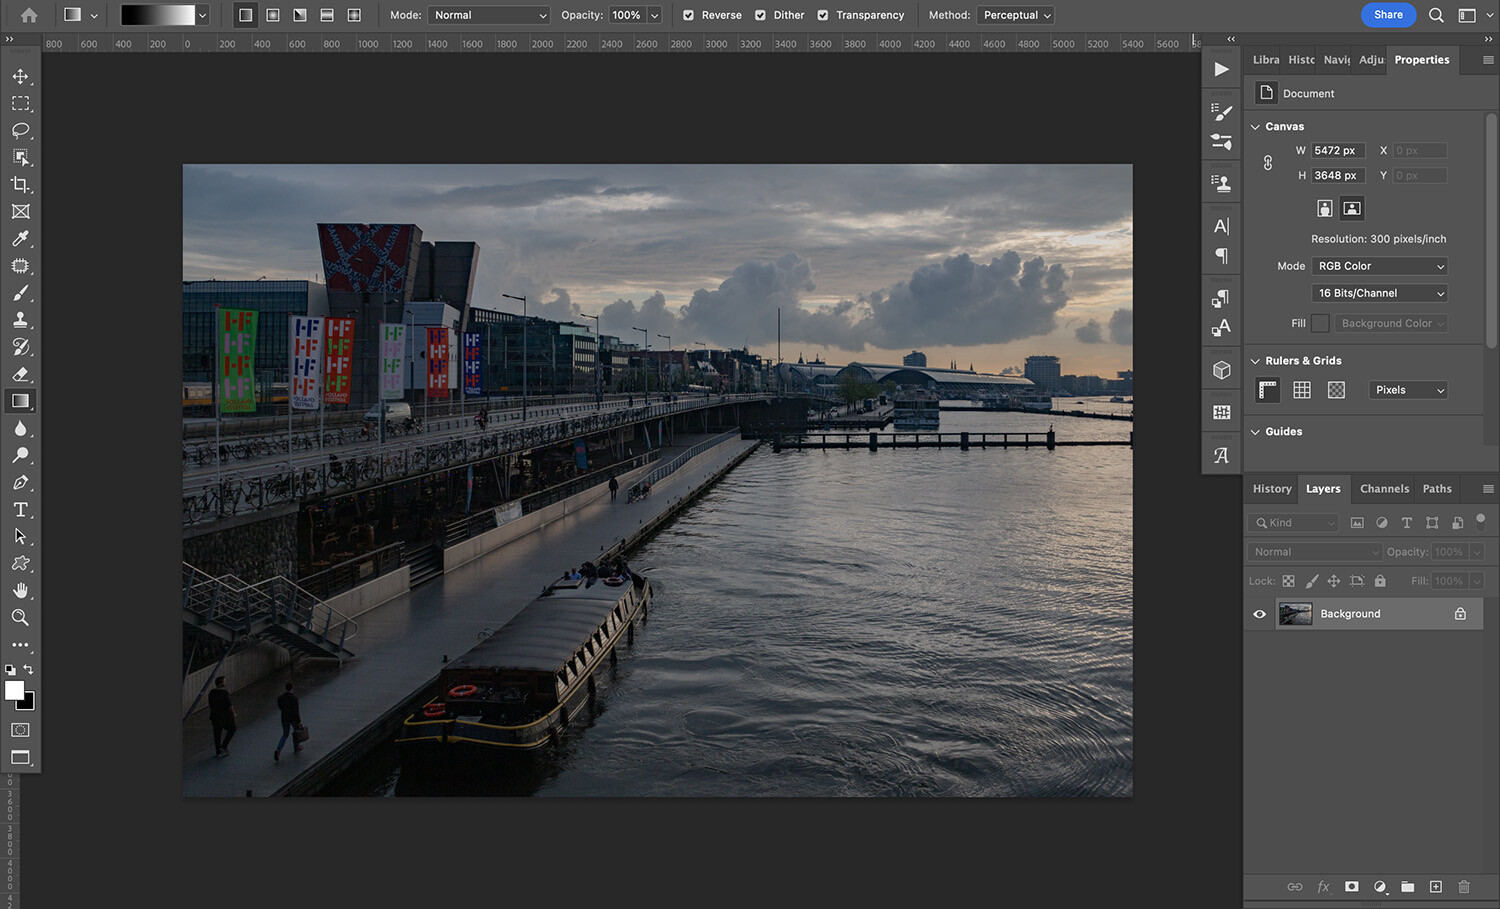
Go ahead and duplicate the original image. Remember, you can simply click and drag it to the plus sign at the bottom of the panel (i.e., the Add New Layer icon). Alternatively, you can select Layer>Duplicate Layer in the Photoshop menu.
Step 2: Apply the Screen blend mode
Next, you’ll want to change the blend mode to Screen. As I explained in the previous section, you can do this by opening the drop-down menu at the top of the Layers panel.
Click on Screen, then watch as the image brightens:
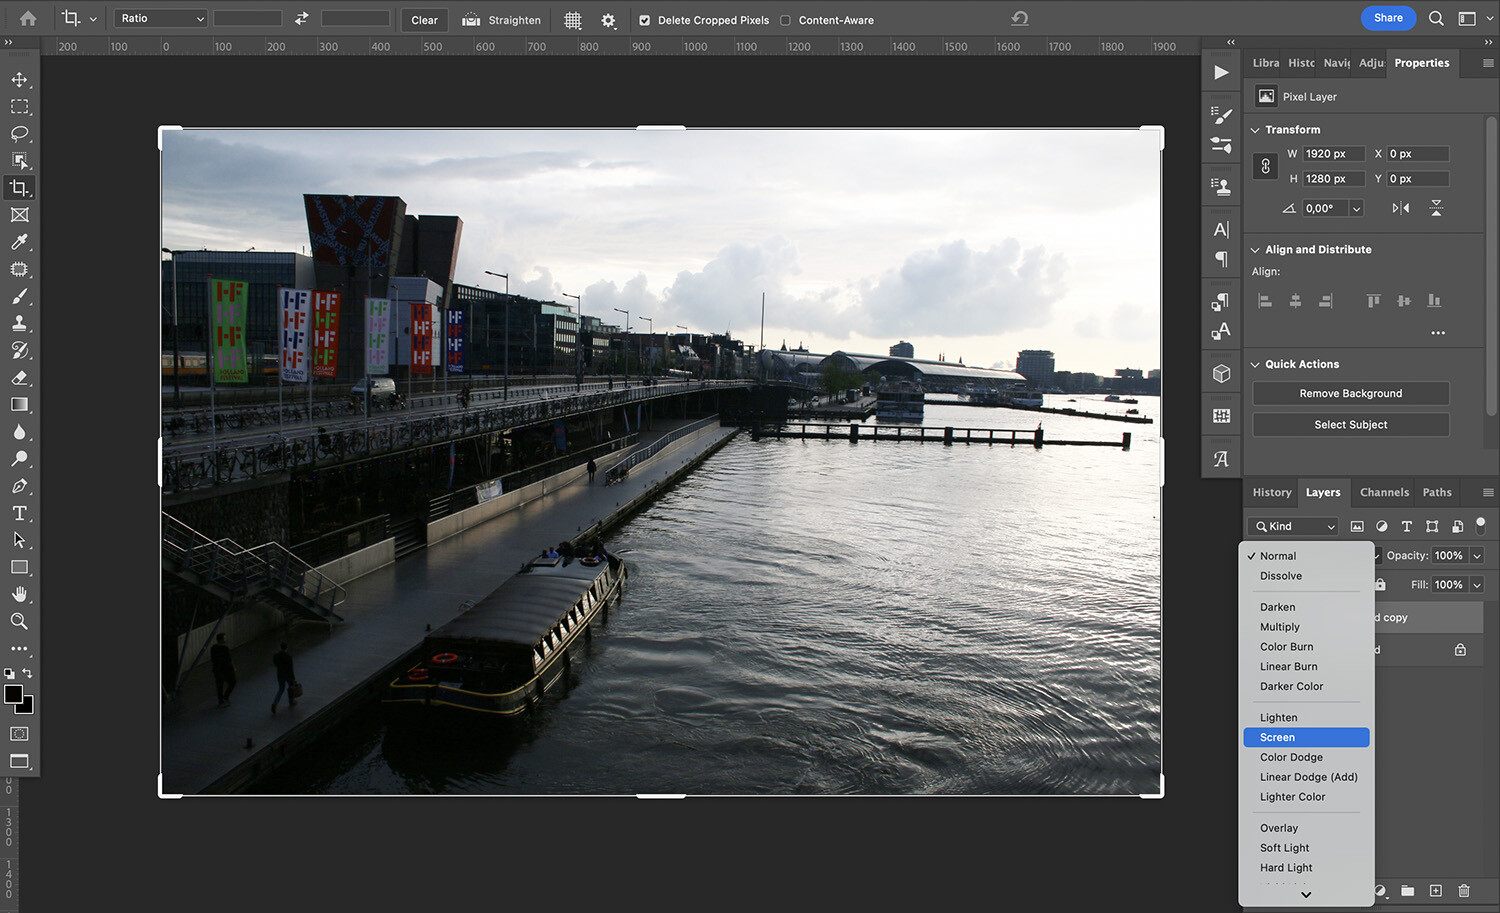
Step 3: Adjust the tones
The Screen blend mode did a great job of boosting the exposure of my image, but the highlights – that is, the brightest portions of the sky and the water- are a bit too bright. I want to lower the effect of the blend mode on those areas (and only those areas).
To do this, I’ll add a layer mask. You can create masks by selecting the relevant layer, then clicking the Add Layer Mask icon at the bottom of the panel. Then grab a Brush, set it to black, lower its opacity, and start painting over the lighter areas (while making sure your mask is selected).
The areas over which I’ve painted decrease in brightness, giving a nice result:
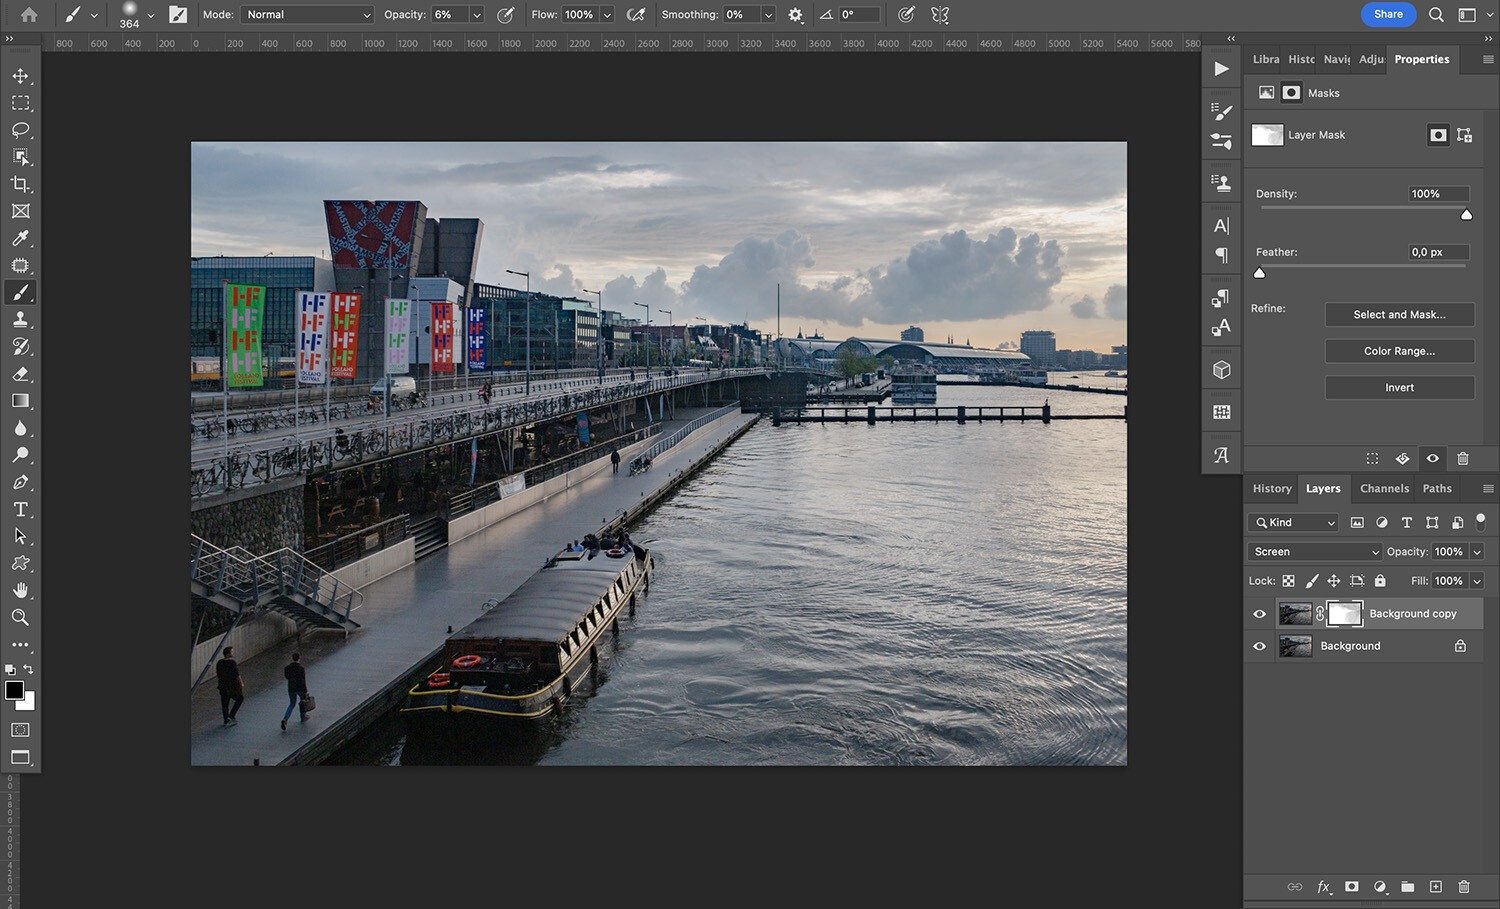
I like what I’ve produced, but I want to brighten the shadows further and add some contrast. To do this, I can create a Levels adjustment layer, then change the blend mode to Screen:
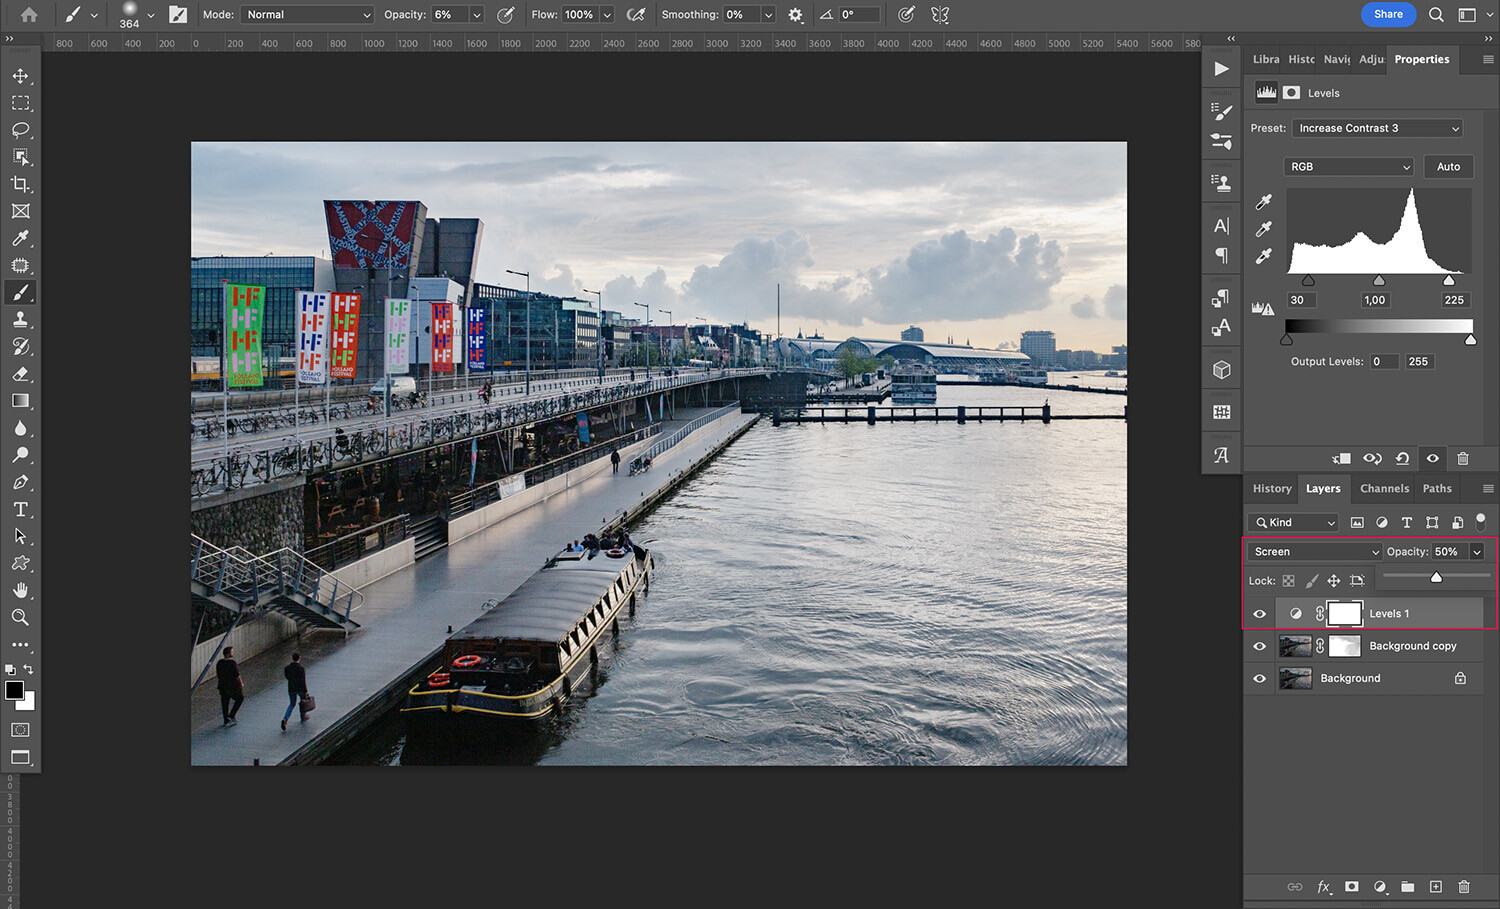
Just altering the blend mode will produce an immediate change – though you can fine-tune the effect using the sliders or the presets in the Levels property panel. In my case, I’ve used one of the presets to increase the contrast.
Note: If you think it’s necessary, you can lower the opacity of your Levels adjustment layer. I turned mine down to 50%, but you should always move the slider to choose a value that’s right for your image.
At this point, my image has details in shadows and highlights, and it’s definitely an improvement compared to the original. However, it looks rather flat. A dramatic sky would give it the extra oomph it needs.
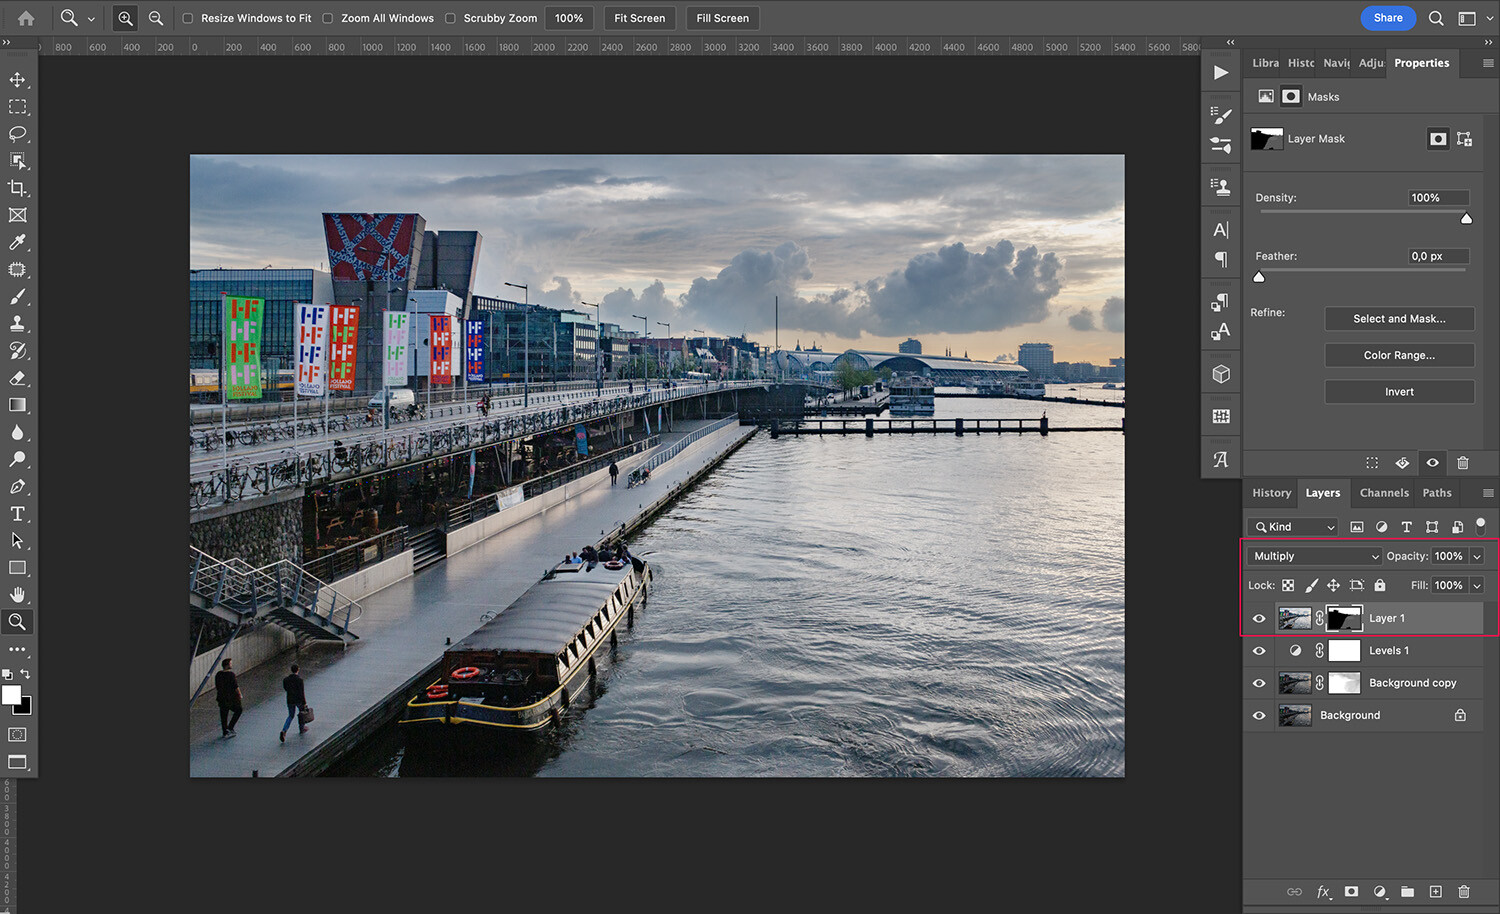
I’ll merge and copy all the layers into a single new file by pressing Ctrl/Cmd+Shift+Alt/Option+E, then I’ll change the blend mode to Multiply.
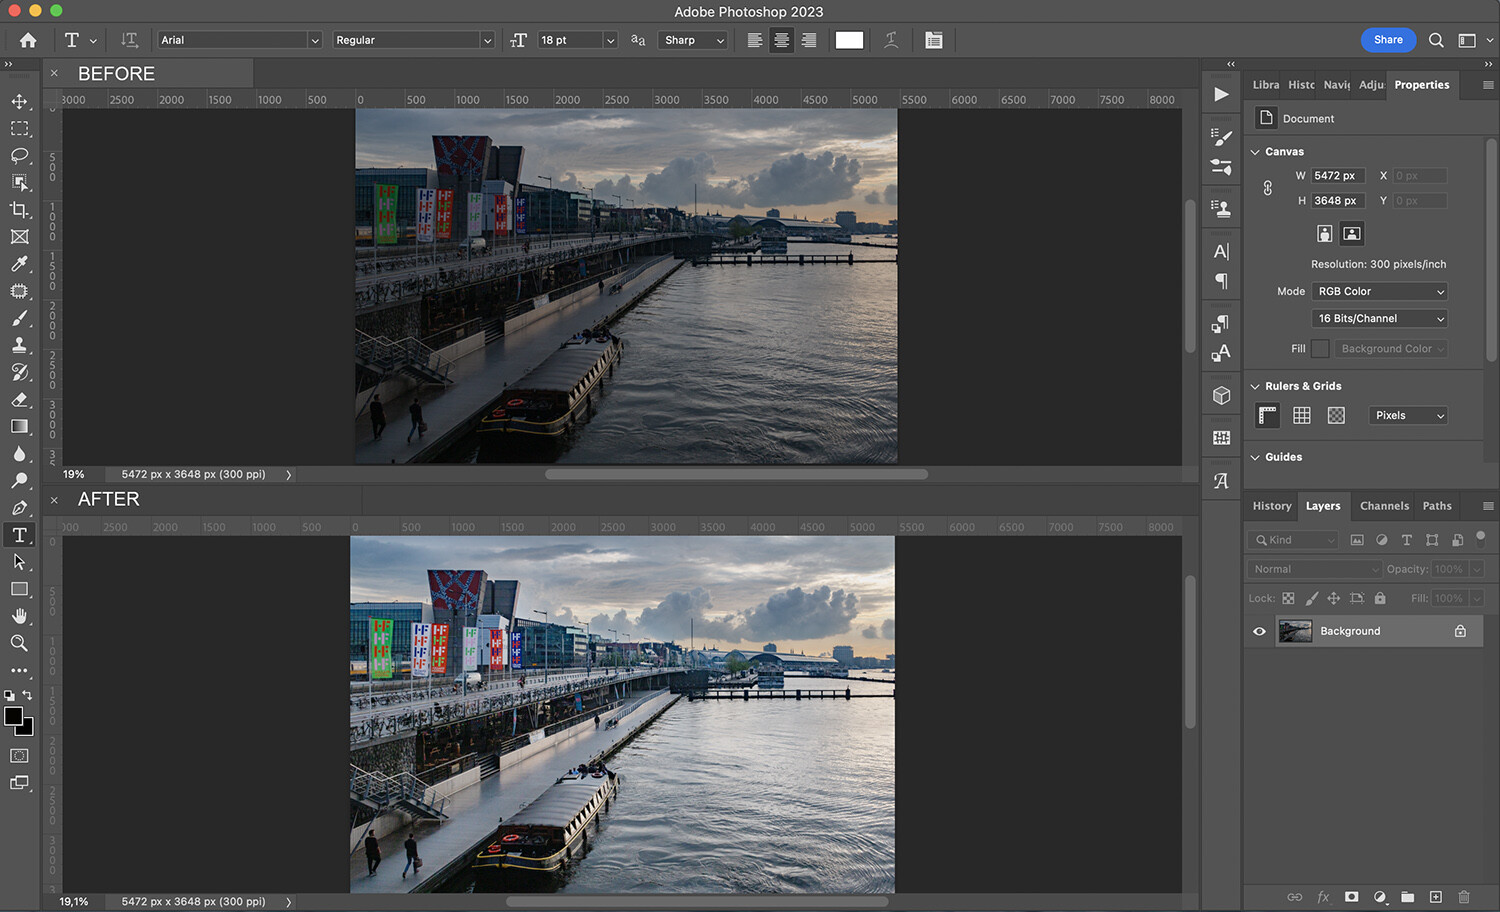
Since Multiply is the opposite of Screen, the image will get darker. Unfortunately, while the sky is now exactly what I want, the rest is too dark again. So I’ll create a layer mask to fine-tune where I want the Multiply layer to appear and where I want the Screen layer to shine through:
And that’s it. Just look at the difference:
Screen blend mode: 2 quick tips
Like any other Photoshop tool, there’s more to Screen than meets the eye. Here are a few extra tips to help you out:
1. Apply Screen blend mode to a filter
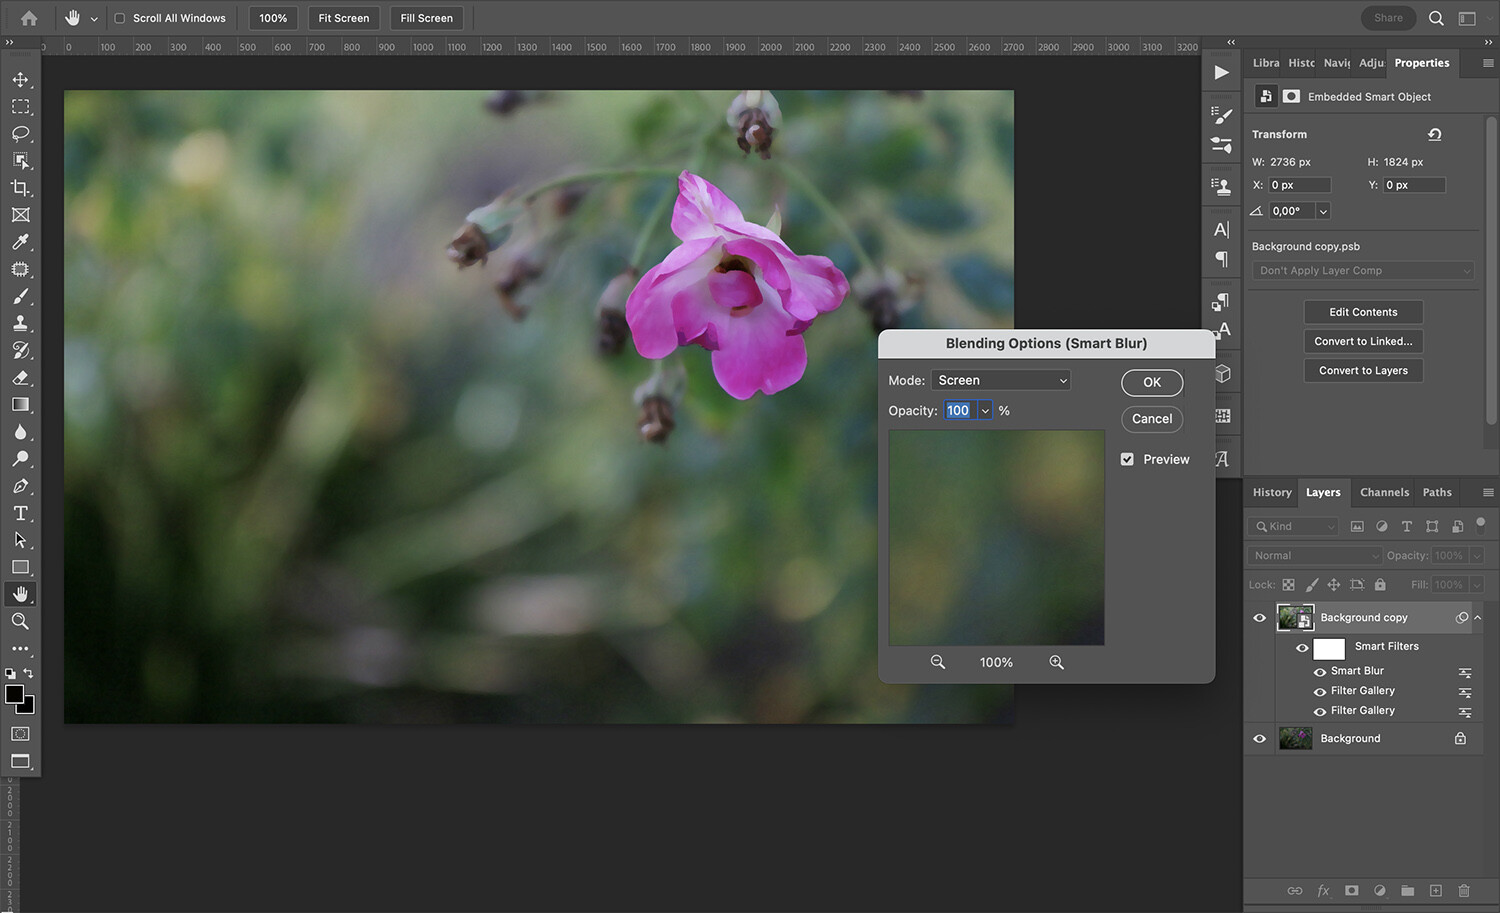
When you’re working with Smart Objects, the filters you apply become Smart Filters – which allow you to change the blend mode (just as if you were working with layers).
To adjust a filter’s blend mode, double-click on the Adjustments icon next to the filter in the Layers panel. This will open a dialog box; simply open the Mode menu and choose Screen:
2. Use Screen to add a tint to your photos
You can use the Screen blend mode to add a tint or a touch of color to your images. Simply add a Solid Color or Gradient layer, then change the blend mode to Screen:
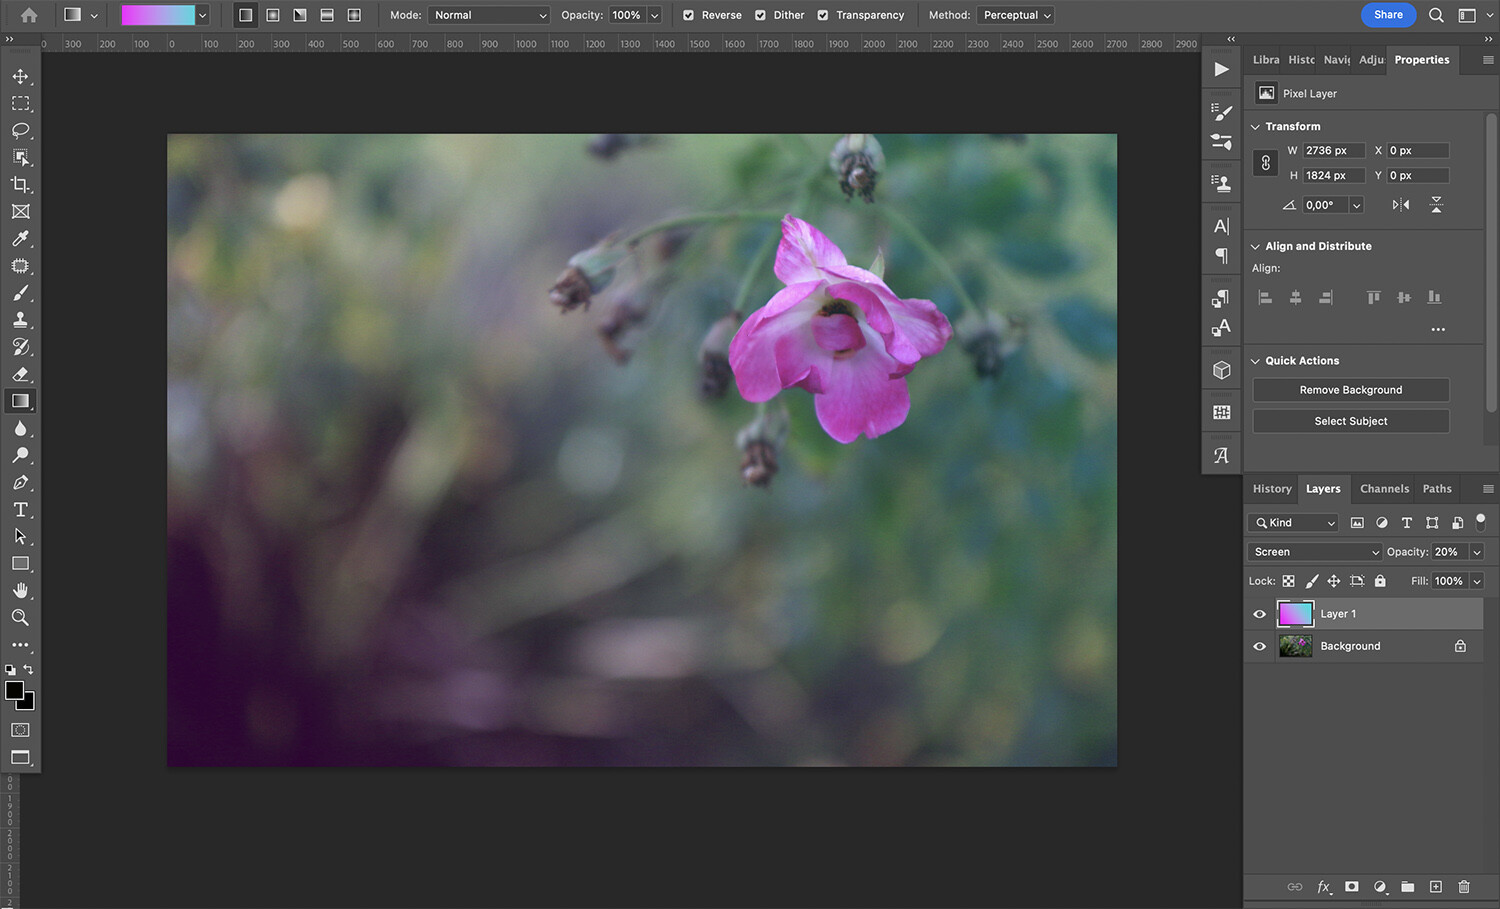
If the effect is a bit strong, you can always lower the opacity. Note that the result may be very subtle, yet it’s a great way to give your images that extra-polished look.
Screen blend mode: final words
Hopefully, you found this article helpful! Screen isn’t a hugely popular blend mode, but it’s actually very useful and versatile. Whether you’re adding clouds to a landscape, steam to a cup of coffee, or brightening an underexposed photo, Screen will make things so much easier.
So if you haven’t already, head into Photoshop and test it out. Try compositing two images, or see if you can subtly improve a photo by using Screen to alter the exposure.
Now over to you:
How do you plan to use the Screen blend mode? Do you have any additional tips? Share your thoughts in the comments below!


