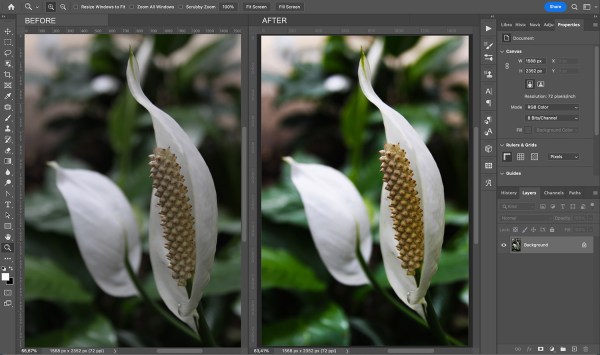
Looking to understand the ins and outs of Photoshop’s Overlay blend mode? You’ve come to the right place.
Overlay is a great way to add punch to otherwise flat images, plus it can be used to apply artistic effects such as color tints. It’s a very versatile blend mode, and it’s pretty popular, too – so it pays to understand what it is, how it works, and when you might want to use it in your photo editing.
Below, we offer a thorough guide to this powerful tool. Let’s get started!
What is Overlay blend mode?
Photoshop – and other layer-based editing programs – offer over two dozen blending modes, which determine how different layers interact. The Overlay blend mode belongs to the “Contrast” section of the blending mode menu, which means that it’ll increase the intensity of the blended layers.
Overlay is actually a mix of two other common blend modes: Screen and Multiply. When Overlay is applied to a layer, Photoshop uses the Screen blending mode to handle any tone that’s brighter than 50% gray. And Photoshop uses the Multiply blending mode to handle any tone that’s darker than 50% gray.
So unlike other Contrast blending modes, it takes effect according to the brightness level of the base layer. In other words, it doesn’t apply some distinct operation to the base color of the layer; instead, it Screens or Multiplies.
That said, if the technical underpinnings of Overlay blend mode are making your head spin, don’t worry. The Overlay effect is easy to understand on a visual level: It makes dark tones darker and bright tones brighter. Look at what happens when I take a normal array of gray tones (below the red line), duplicate the image, and apply the Overlay blend mode (above the red line):

The lightest tones (on the left) got even lighter. And the darkest tones (on the right) got even darker.
When should you use Overlay blend mode?
As I mentioned above, the Overlay blend mode is a mix of two other blending modes – Screen and Multiply – so it’s very versatile. You can use it in all sorts of scenarios, though here are a few of the most common:
How to use the Overlay blend mode
Using Overlay isn’t especially difficult. Start by opening an image in Photoshop, then add a second layer.
(Why is this necessary? Remember that blending modes tell Photoshop how layers should interact. Changing the blending mode of a single layer doesn’t have any effect; instead, to see a difference in your image, you need a second layer that can interact with the first.)
The type of layer you add doesn’t really matter. It can be a Smart Object, another picture, a solid color, an adjustment layer, etc.
Next, go to the Layers panel, which should be on the right-hand side of the screen. If you can’t see it, select Window>Layers or press F7.
Select the top layer in the layer stack. Then open the blending modes menu by clicking the down arrow next to the current blending mode:
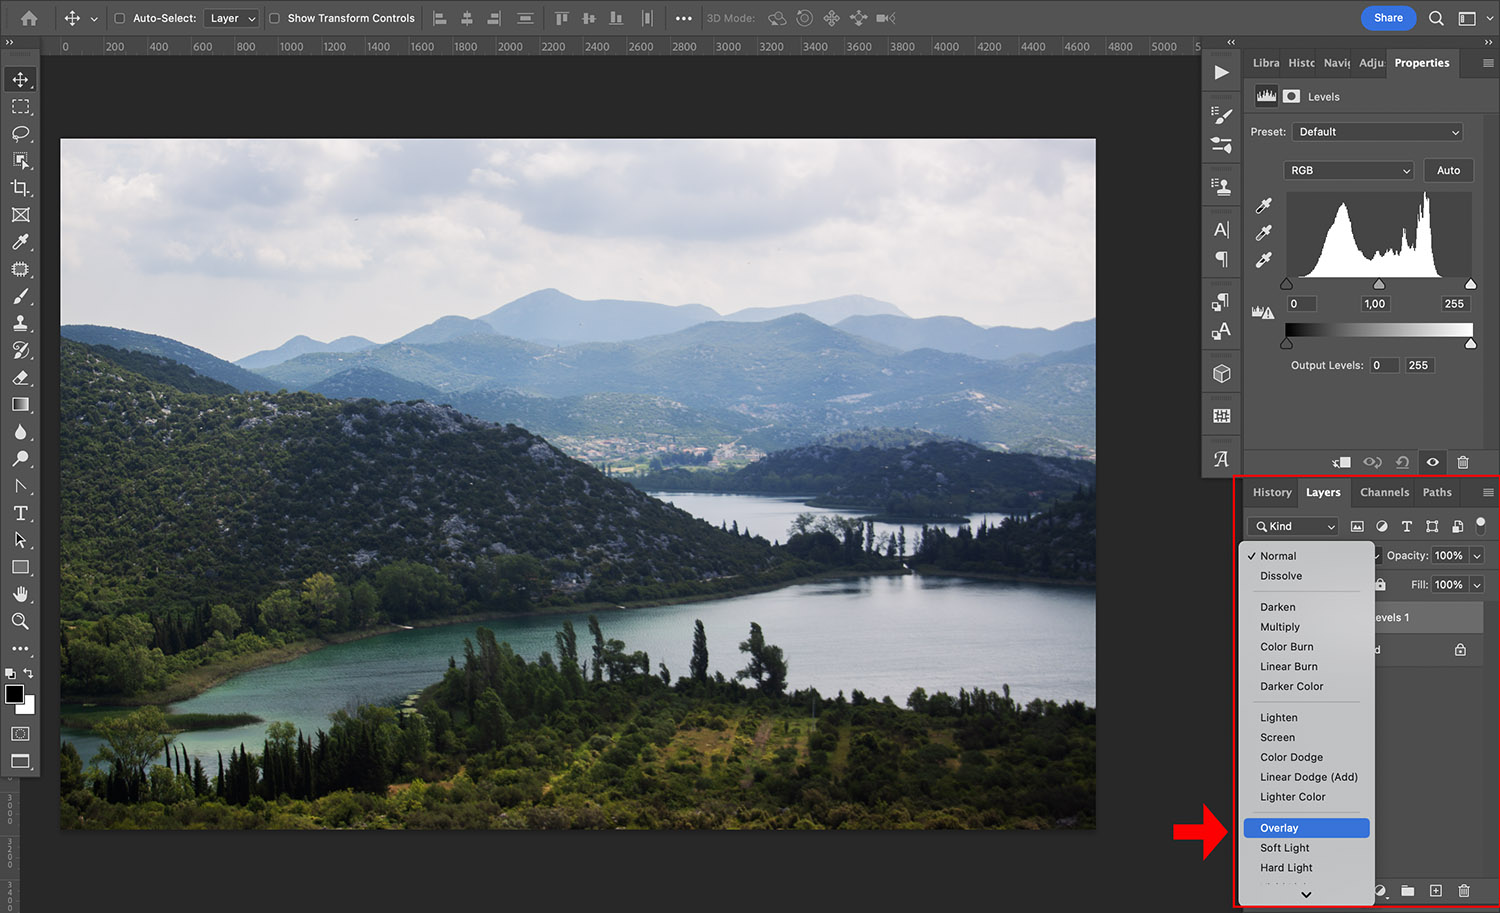
Navigate to the Overlay blend mode. In Photoshop CC, you can see the blend mode’s effect on your image just by hovering over it. In Photoshop CS6, however, you won’t be able to see the effect until you’ve applied it to your image.
That’s it! If you want, you can adjust the layer’s opacity using the slider next to the blend mode menu.
Overlay blend mode: A step-by-step example
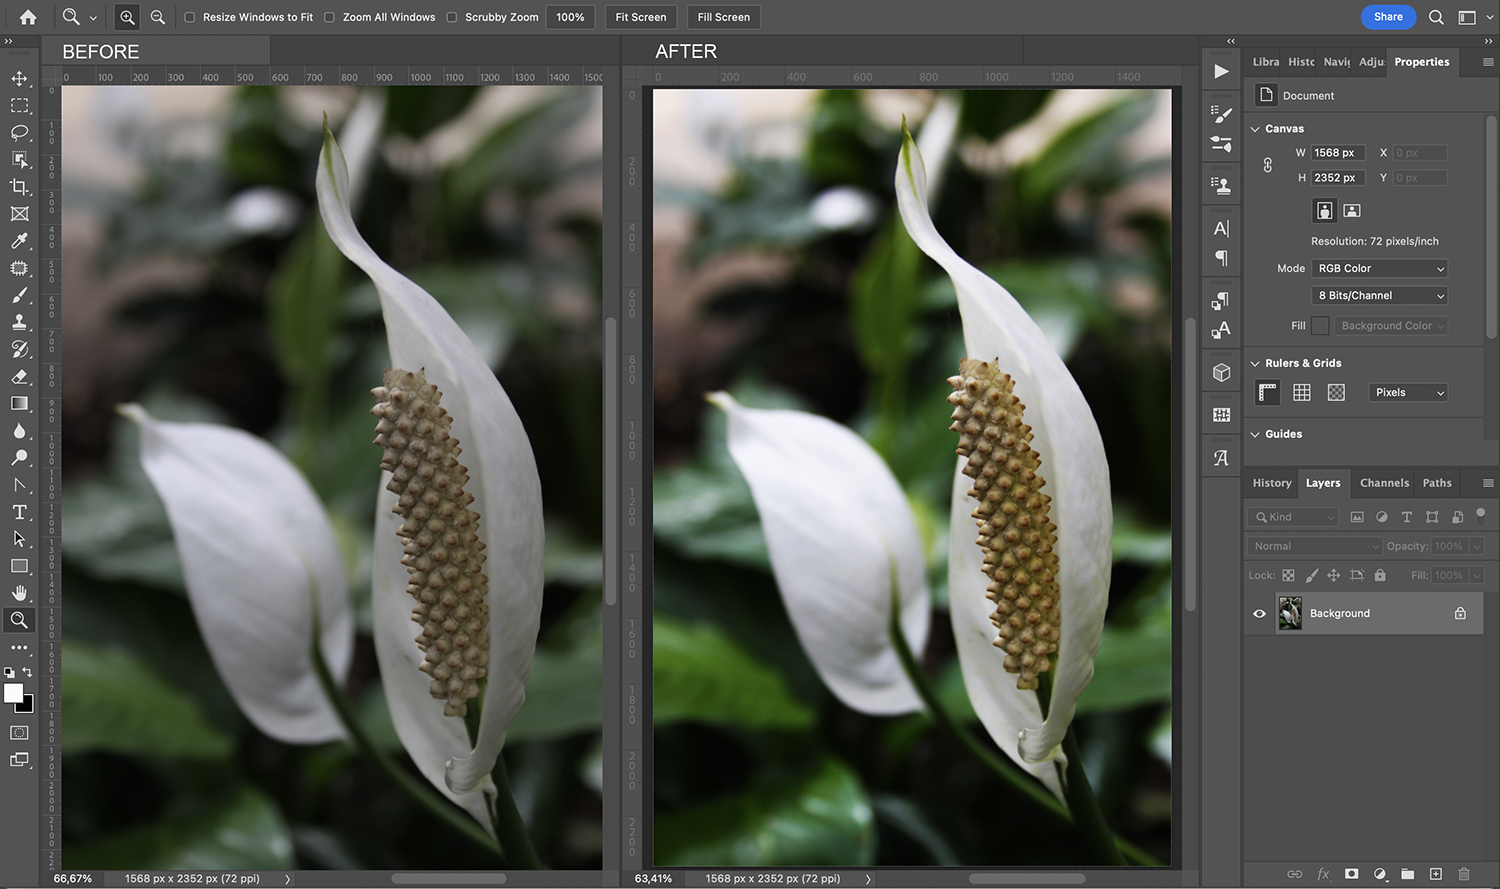
As I mentioned, one of the most common reasons photographers and retouchers use the Overlay blending mode is to add contrast. So that’s what I’ll show you in this example.
My sample photo is a bit underexposed and lacks contrast:
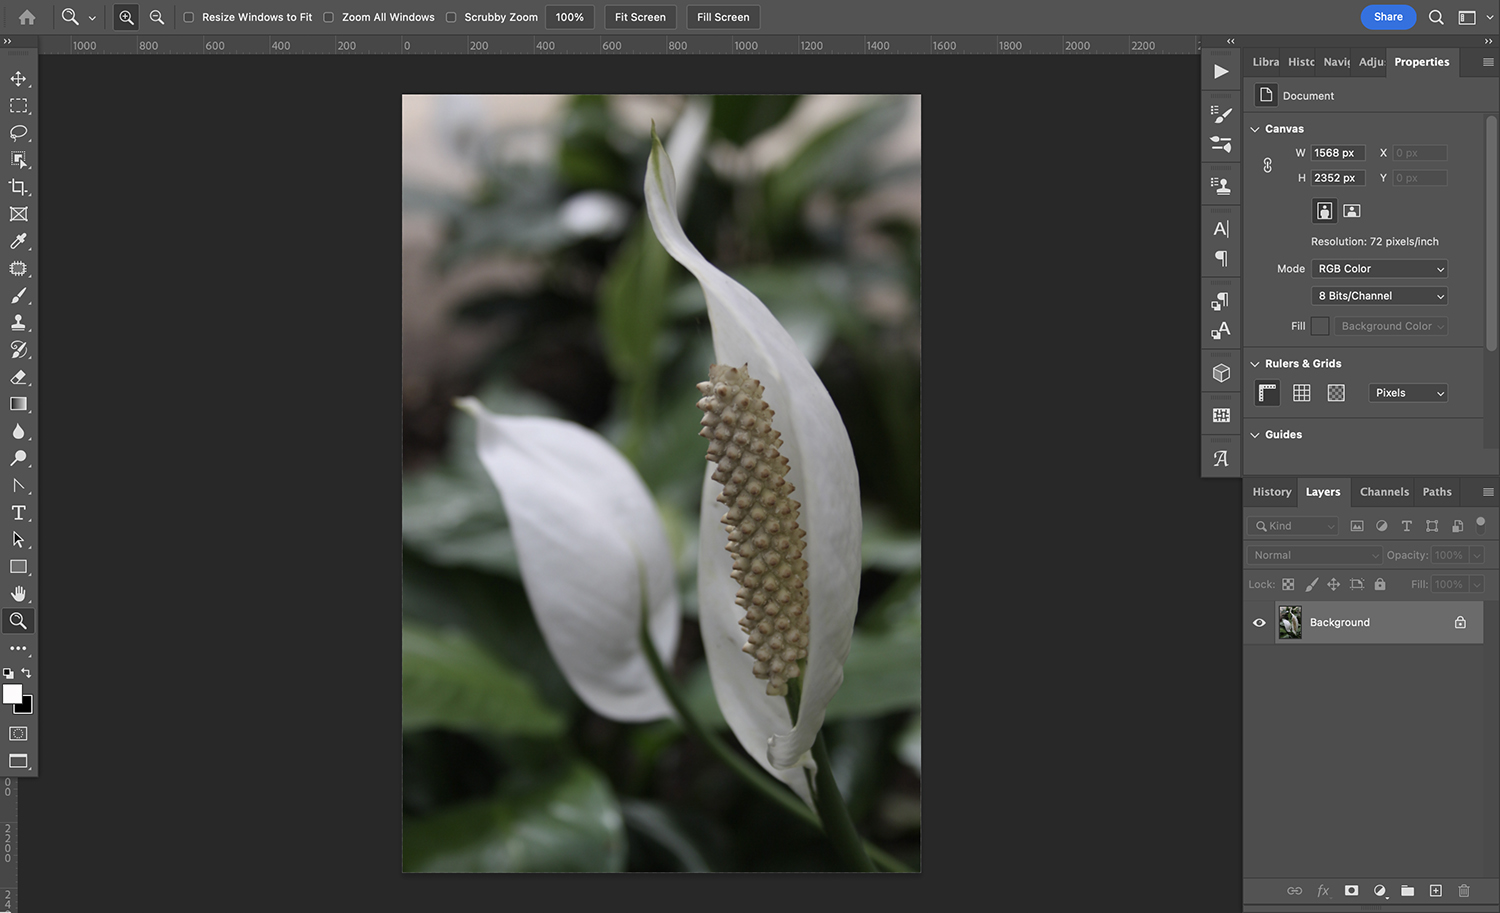
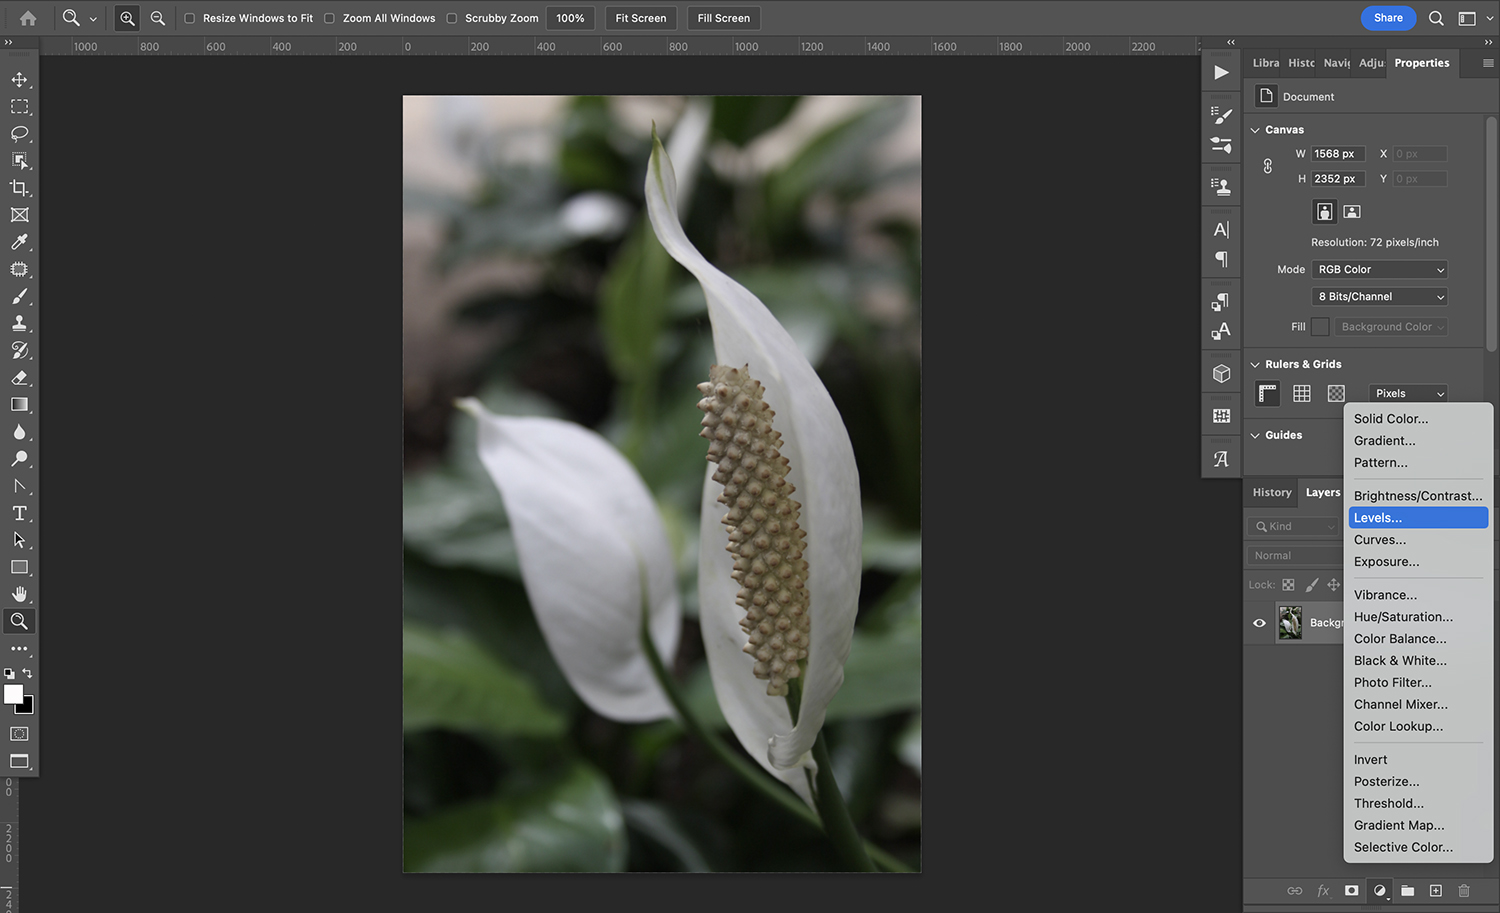
So I’ll click on the Create new fill or adjustment layer button and select Levels. (Alternatively, I could select Layer>New Adjustment Layer>Levels in the menu.)
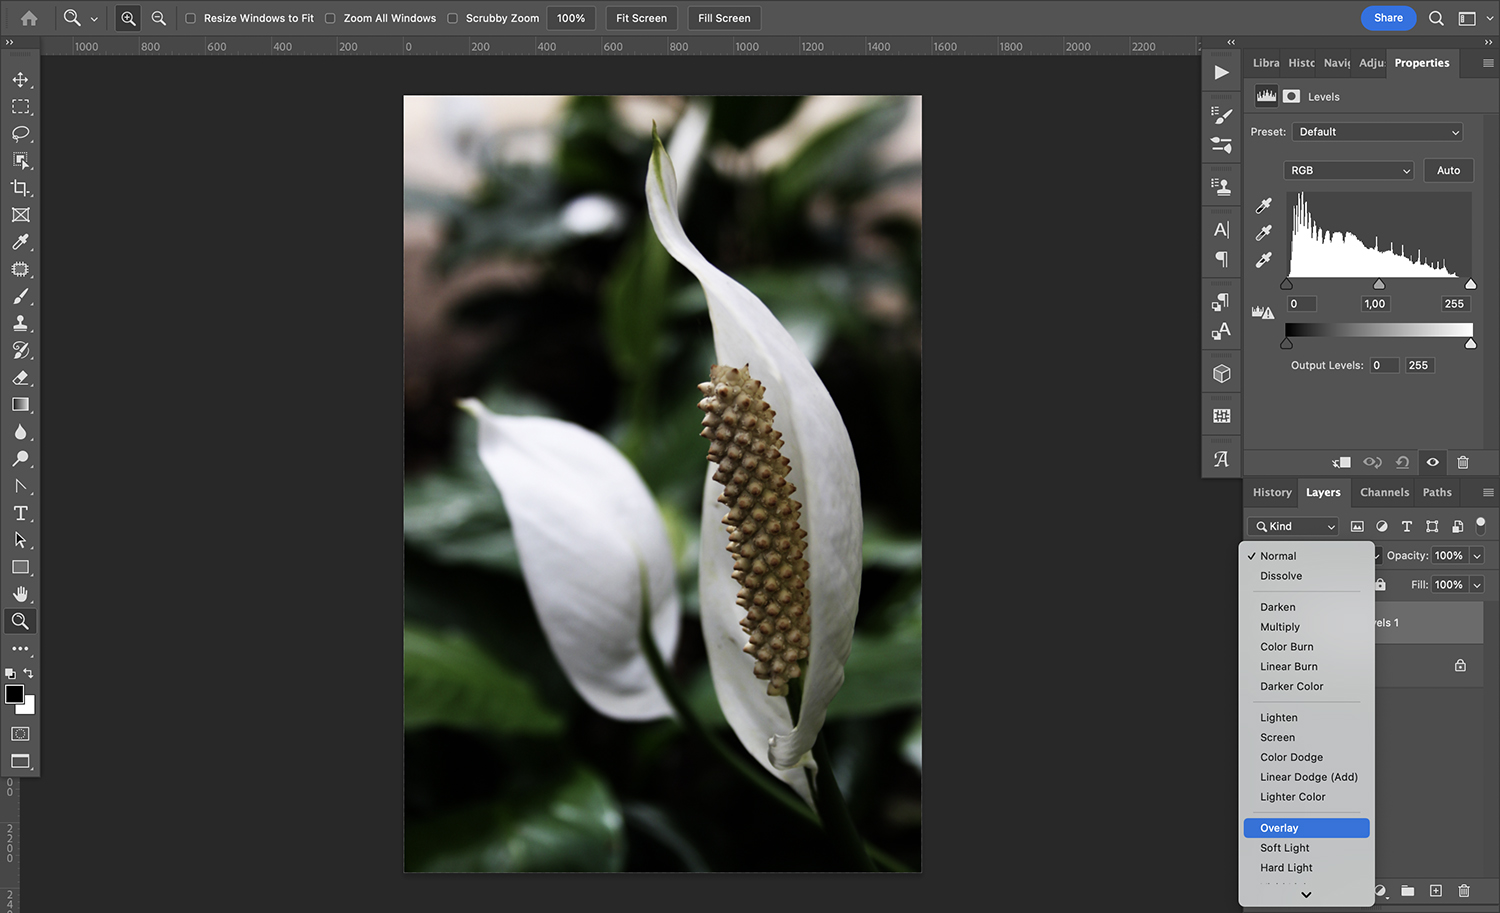
Without ever touching my Levels adjustment, I can simply change the blending mode to Overlay and watch as the contrast is increased:
But if I want to modify the effect, I can use the Levels sliders to adjust the highlights, midtones, and shadows:
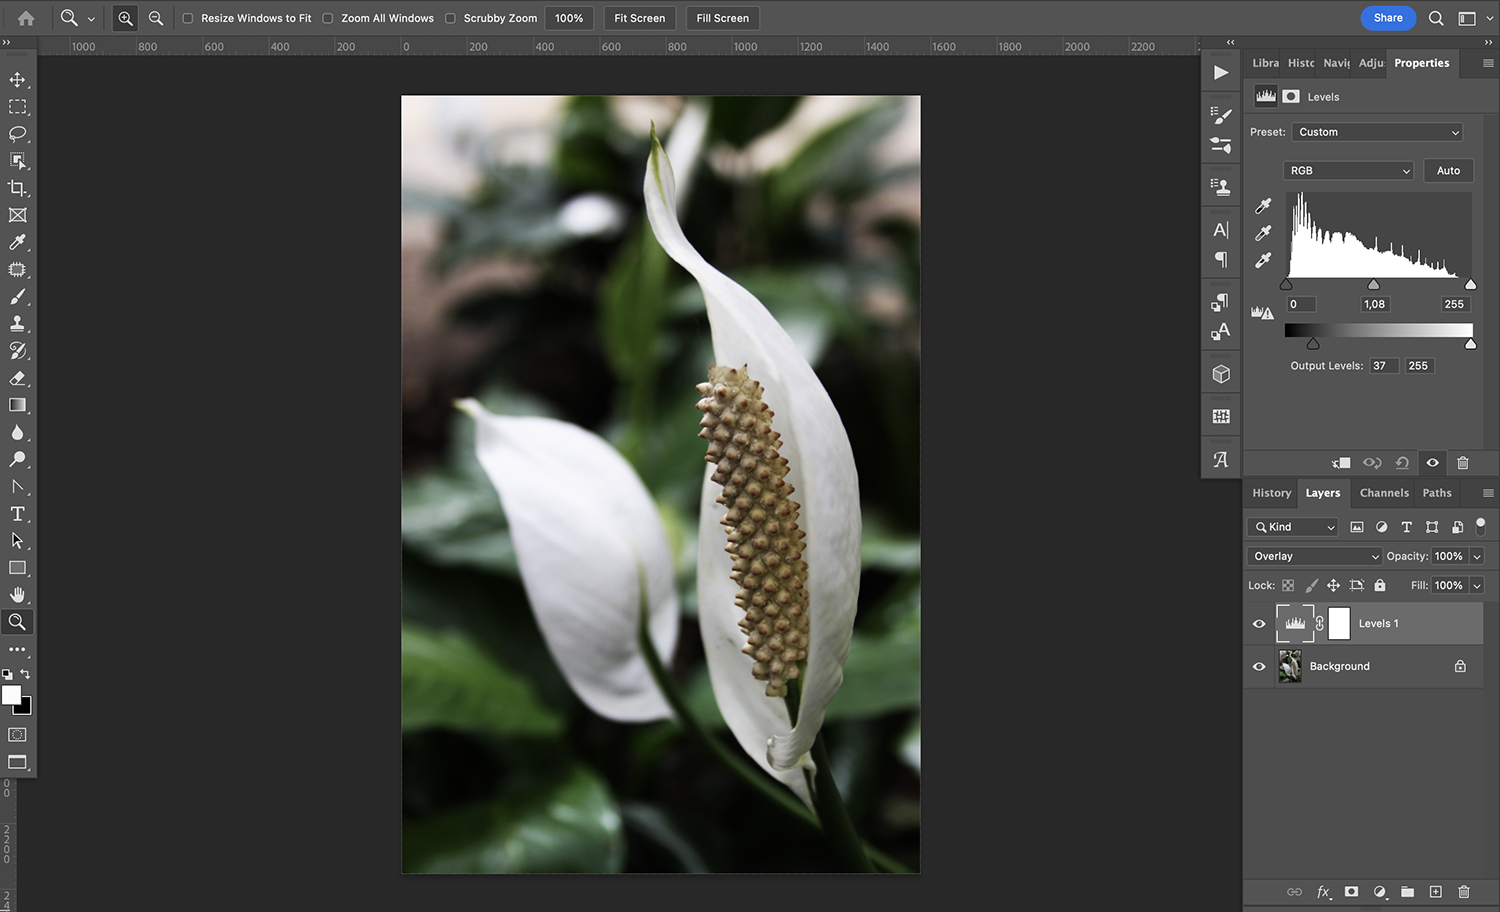
If I like the look but feel it’s too strong, I can always decrease the opacity of the Levels layer:
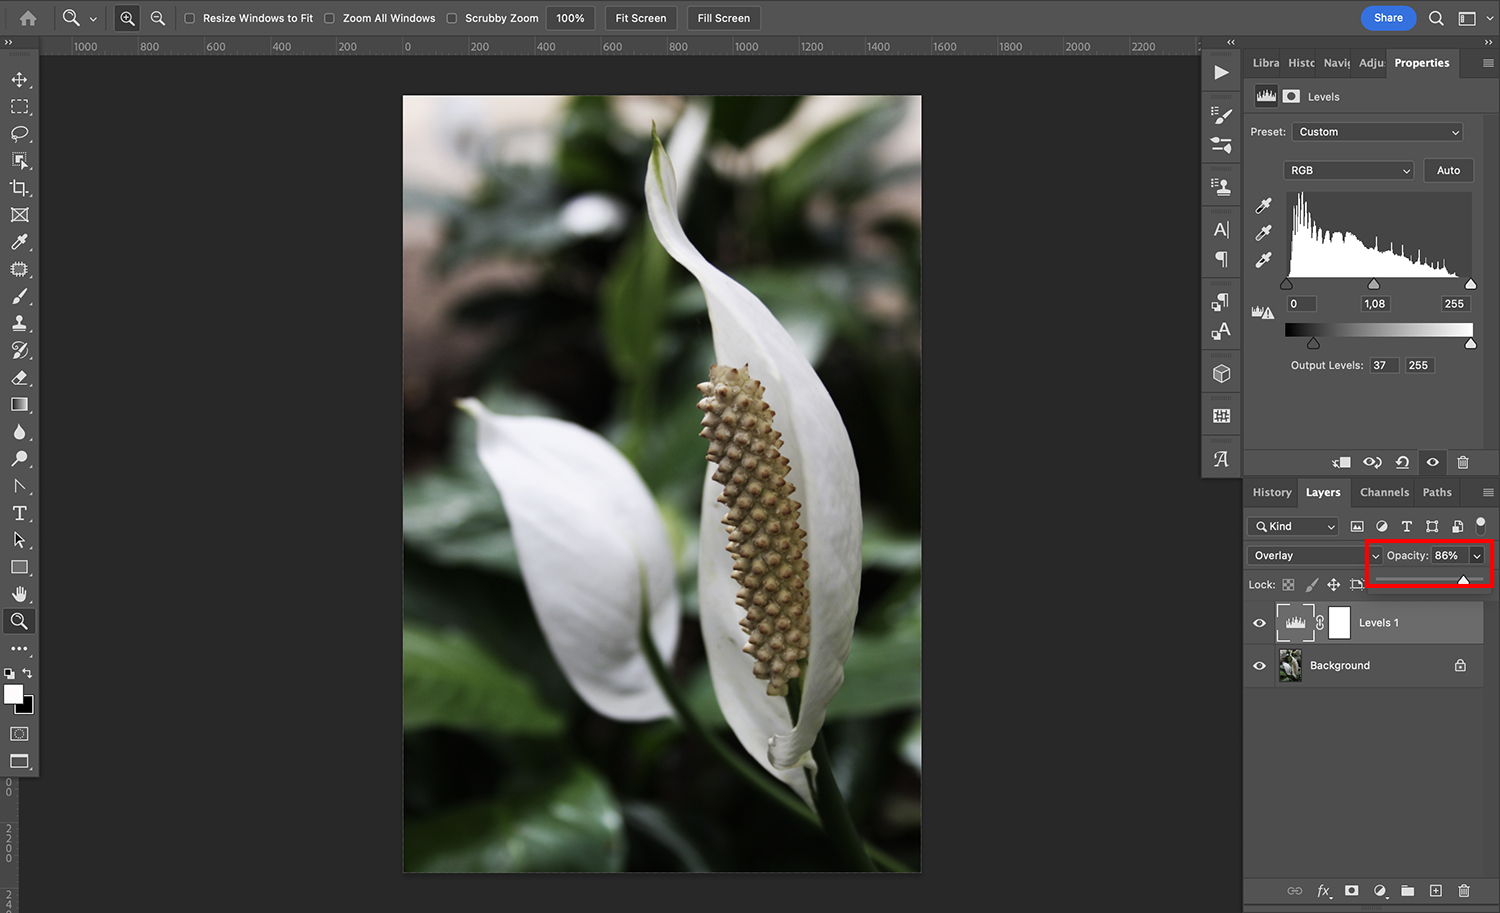
Note: Once you’re done adding contrast via the Levels panel, you can always add more adjustment layers (Curves, Color Balance, Hue/Saturation, etc.) to fine-tune your image, or you can save it as it is.
Overlay blend mode tips
Enjoying the power of Overlay blend mode? Here are a few extra tips so you can really explore its potential!
1. Try adding a tint to your photo
If you’re looking to add a tint, a texture, or some other type of final color grade, Overlay can be very useful.
For this next image, I wanted to add a blue tone to mimic cyanotype printing:
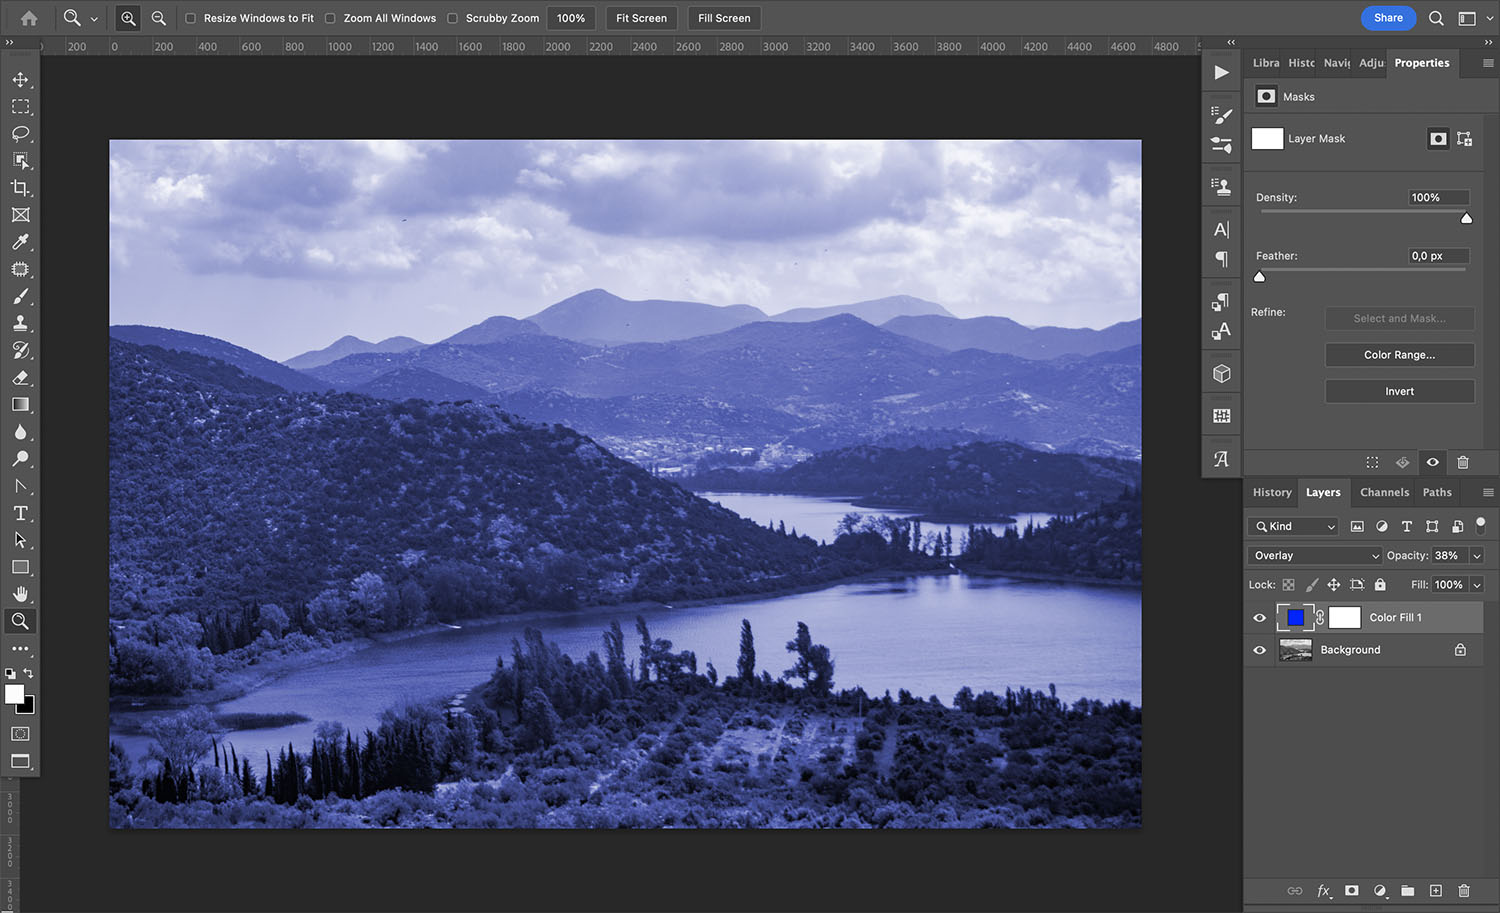
All I did was convert the photo to black and white. Then I added a Solid Color adjustment layer, chose a nice blue color, and changed the blending mode to Overlay. That’s how I got the effect shown above!
2. Don’t forget about the Hard Light blend mode
Photoshop has several commuted blending mode pairs. With a commuted blending mode pair, you get the same result when applying one blend mode to the top layer as when applying the other blend mode to the bottom layer (and reversing the layer order).
Overlay and Hard Light are commuted blending mode pairs, so if you apply the Overlay blend mode to the top layer, your image will look exactly the same as if you applied the Hard Light mode to the underlying layer before switching the layer order. (Just a useful little tidbit to keep in mind!)
3. Add a cool glowing effect
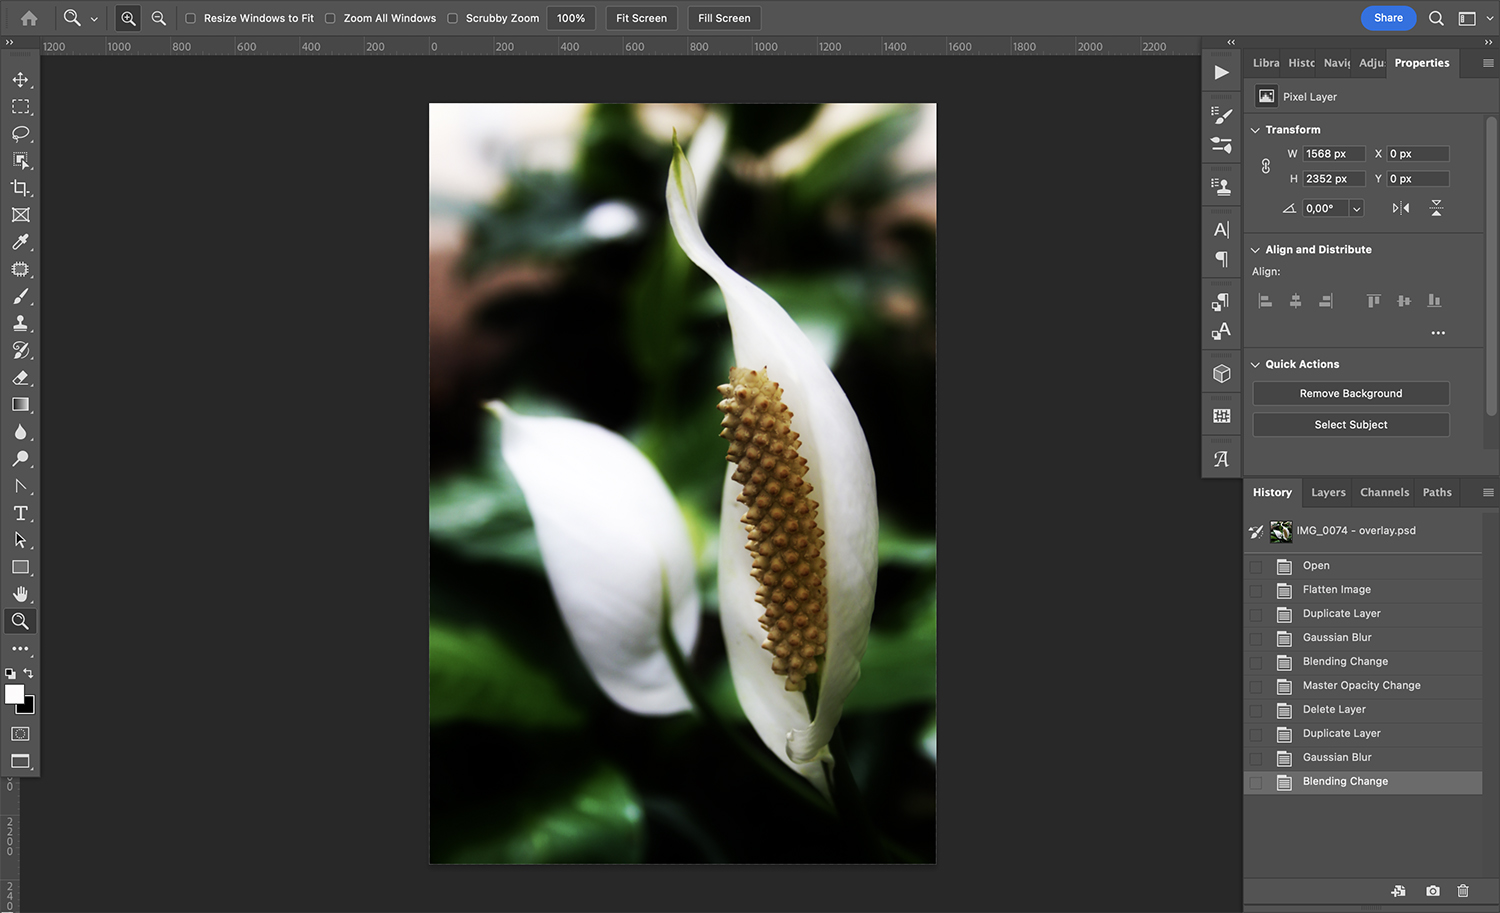
Here’s a fun technique: You can use the Overlay blending mode to add a glowing effect – sometimes called an Orton Effect – to any photo.
Start by duplicating your original layer. You can do this by dragging the layer over the Plus sign at the bottom of the Layers panel.
Then convert your duplicate layer to a Smart Object. (Simply right-click on the layer and choose Convert to Smart Object from the menu. Alternatively, go to Filter>Convert for Smart Filters.)
Technically, the Smart Object conversion step is optional, but it will allow you to go back and adjust your glow effect later on, which can come in handy.
Now select Filter>Blur>Gaussian Blur in the menu, which will open a dialog box where you can set the intensity of the blur (this will directly affect the intensity of the glow effect). Note that there’s no correct blur amount; it depends on the photo and your taste, so you’ll have to use the trial-and-error method.
Once you get a result you like, simply change the blending mode to Overlay, adjust the opacity as needed, and check out your image’s beautiful glow!
Overlay blend mode: final words
I hope you found this guide to the Overlay blend mode useful. As you should now be aware, it’s a helpful blend mode that can be applied in plenty of different situations.
And if you’re not sure whether Overlay might work for a certain scenario, just try it! There’s no harm in experimenting.
How do you plan to use Overlay when editing photos? Do you have any tips? Share your thoughts in the comments below!
