Because white background portraits are so common, many people think it’s an easy effect to achieve. You simply set up a white background, put your subject in front of it, and take the picture (preferably with a flash or strobe) – right?
Unfortunately, it’s not so simple. If you try the method described above, you’ll end up with a photo that features either a gray, dull, or muddy-toned background. The best possible result would be an off-white background after you have done some edits. And that’s not the only issue; you’d see unwanted shadows everywhere, too.
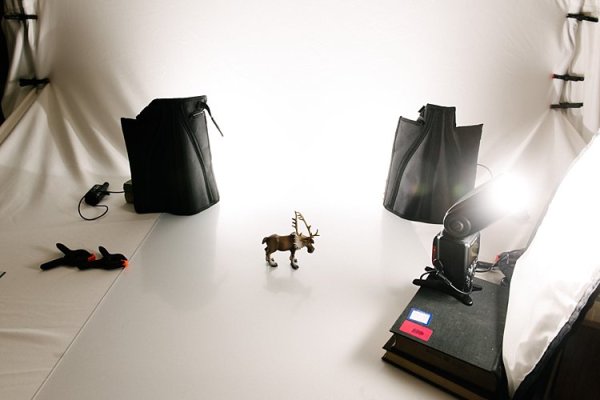
I have replicated a standard white-background setup with my little model, Sven (Kristoff’s beloved reindeer in the movie Frozen). It is easier doing this with a small-scale subject, as my artificial lights are huge in comparison. You can do the same with people and get the same high-key effect; however, since people are much larger than small objects, you need to have massive octaboxes and flags. Regardless, this tutorial will show you the process clearly, and you can scale it up as needed!
So here are three rookie mistakes to avoid when trying to achieve 100% pure-white background photography:
Mistake #1: The background is not properly lit
The background must be lit with approximately two stops more light than the subject. For example, if you want to photograph your subject at f/8, set your background lights to two stops brighter, so your meter reads f/16 on the background.
Note: You need to meter foreground and background lights separately, so that when metering for the main light (on the subject) you would turn the background lights off and vice versa. When both the background and main lights are on, your meter should still give you f/8 on the subject, because you are metering the light that falls on your subject and not on the background.
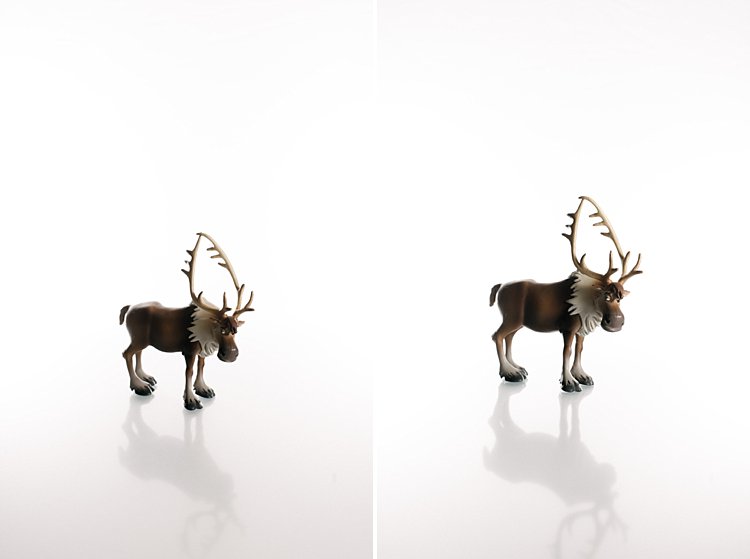
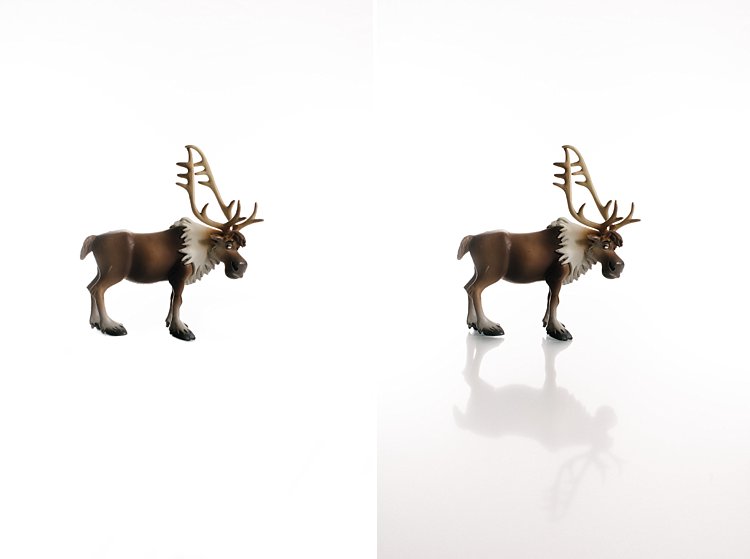
The photo below (right) shows what it looks like when you don’t light the background at all. You get a tone and color other than the intended white. In the photo on the left, the background was lit, but there was no main light illuminating the subject. Therefore, the resulting image is almost a silhouette of the subject.
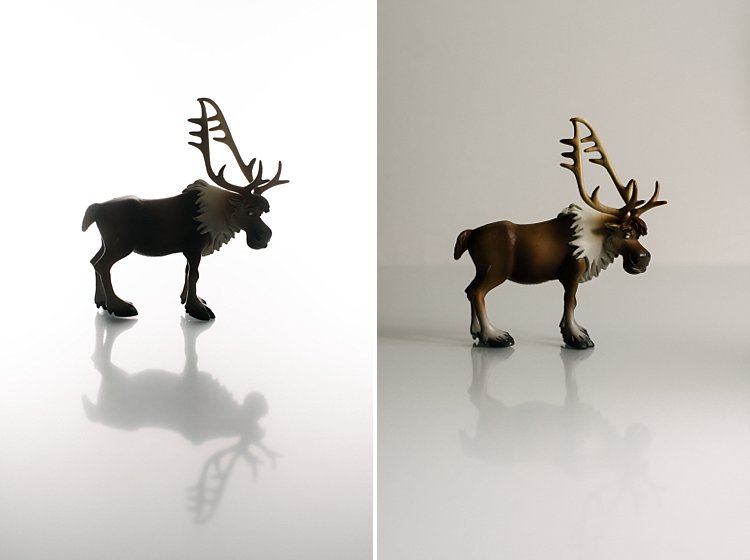
My camera settings for all the shots in this setup were ISO 250, 1/160s, and f/8 (though the background gave a meter reading of f/16). I set my speedlights to 1/16th power (I rarely use my speedlights at full power because the batteries run out very quickly).
The camera was a Nikon D750. It’s on the older side, but it handles noise superbly, so ISO was not an issue. Two SB-910s and one SB-900 speedlight were used for this setup.
The photo below shows the setup with only the left background light firing:
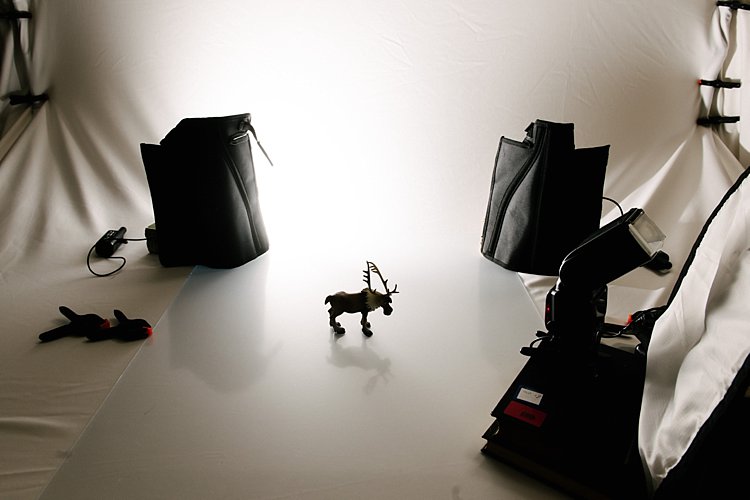
You will notice in the two images below that only the right background light fired in the left photo, and only the left background light fired in the right photo. Such lighting is acceptable, of course, if that is your intention. The main light was positioned at a 45-degree angle on camera right. I wanted to bounce my flash onto the white rogue bender to modify the light.
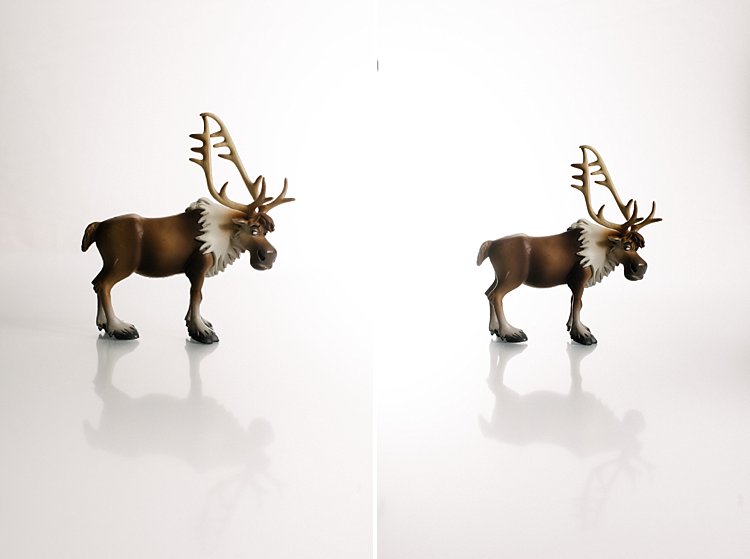
You may also notice that in the left photo (above), there is a very slight shadow of Sven on the background behind him – because the left background light didn’t fire. When the background light did fire on the left, this shadow was eliminated (right photo, above).
Below is the setup with all three lights firing correctly.
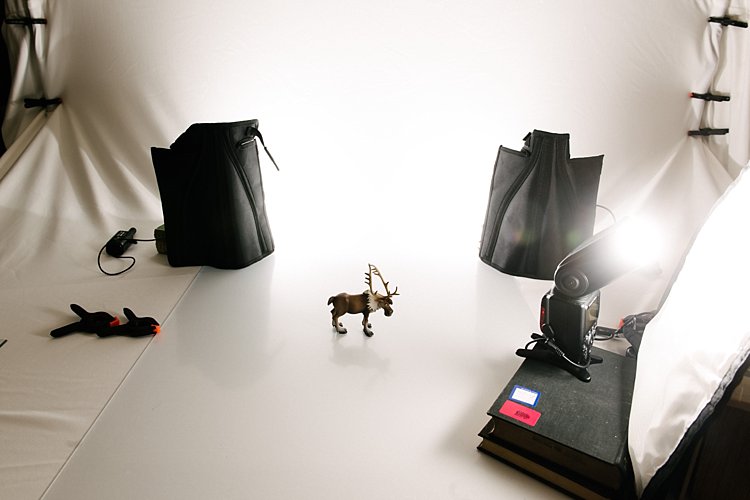
Now that you have your background and main lights set up, you need to make sure these lights only hit the intended subject. This leads us to the next rookie mistake: separation.
Mistake #2: Not enough subject-background separation
Because the background lights are so much brighter than the foreground light, you need to separate them from the main subject. There are two key ways of doing this:
- Flagging
- Distance
Flagging
You can use anything black to flag your lights: the black side of a reflector, black cardboard sheets, or black foam core.
Black does not bounce light; instead, it absorbs light. It also blocks light from seeping through to places where you do not want it. If you don’t flag (block) your background lights, your subject will end up with a halo effect and look very backlit.
Distance
Once you have flagged your lights, you need to position your subject far enough away from the background (and from the background lights) that any light spillage won’t touch your subject. This depends on your personal preference and intention, of course – you may want some spill on your subject for a certain look or effect, or you may not.
If you do want some spill, make sure to run a few tests with various lenses, as chromatic aberration may occur around the edges of your subject due to the abundance of light. Some lenses are prone to chromatic aberration regardless of aperture, while others perform very well even at wide apertures, where chromatic aberration is most commonly observed. Also, be careful with the amount of spill you allow – you don’t want to chop off parts of your subject from the spill overexposure.
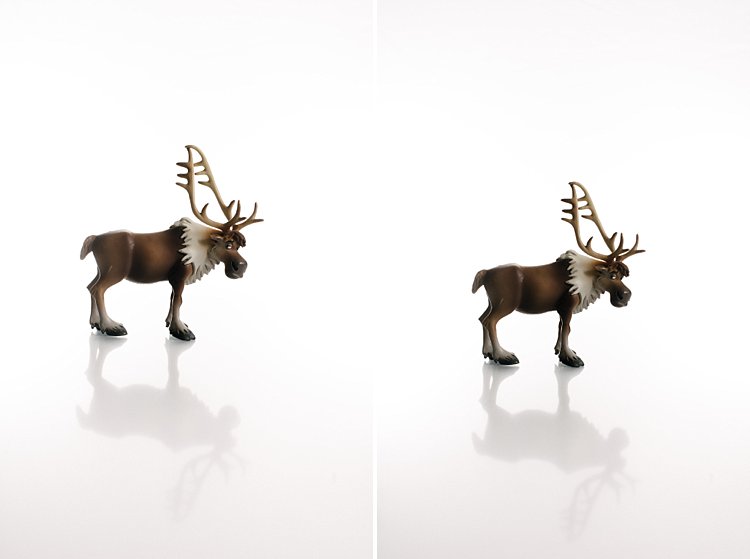
The photos above show a properly-lit Sven. The two background lights fired at f/16 and the main light fired at f/8. There are no unwanted shadows on the background, as was my intention.
However, I wanted to have a reflection and shadow in the foreground. This leads nicely to the third rookie mistake to avoid: a floating subject.
Mistake #3: The subject is floating
If you do not include some floor shadows, your subject will look like it is floating on white air, or like it’s cut out and pasted on a white sheet of paper.
The best tip for avoiding floating subjects is to use a reflective surface such as translucent white plexiglass, or white tile sheet, as a base for your subject to stand on. You can adjust the opacity of the reflection in Photoshop during post-processing, but having the reflection shows that your subject is planted firmly on solid ground.
Bonus mistake #4: The overexposed background
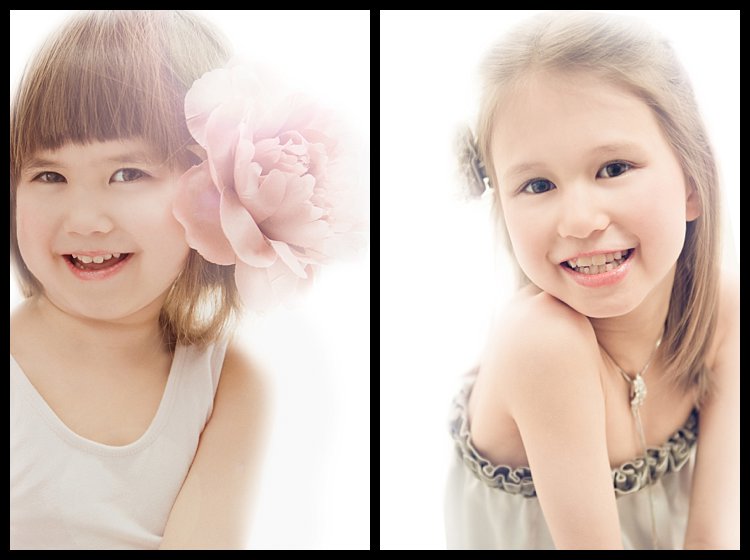
Be careful not to add too much light to the background. If you go past pure white and really overexpose a shot, the white will start almost glowing around the subject, just like if you had sun flare outdoors.
This lowers contrast and makes your subject look like they have a bit of a halo. You can see this overexposed effect in the images below:
White background photography mistakes: final words
I hope this little tutorial has shed some light on basic techniques for creating a white background, and that it has solved any and all mysteries regarding how to achieve such a look.
White backgrounds are useful in a wide variety of studio scenarios: when photographing products, when photographing people, when doing macro photography, and more.
Now that you’ve finished this article, you should be able to recreate it with success!
Now over to you:
How do you plan to use the white-background look? Do you have other techniques for achieving the effect? Share your thoughts in the comments below!
